

The lead webhook is available on the Growth and Pro plans. Only platform admins, the project owner, and project admins can change it.
How it works
1
A lead comes in
A form, call, or other lead source creates a new lead in LeadTrackr
2
LeadTrackr sends the lead
LeadTrackr sends a
POST request with the lead as JSON to your webhook URL3
Your CRM creates the record
Your endpoint or automation creates a contact or deal and stores
lead.id4
Send the result back
When the deal progresses, your CRM calls Update Lead Status with that
lead.id. LeadTrackr then sends the conversion to your ad platformsStep 1: Get a webhook URL
You need a URL that accepts aPOST request with a JSON body. Where you get it depends on your setup:
- n8n: add a Webhook node, set the method to
POST, and copy the production URL - Make: add a Custom webhook trigger and copy its address
- Zapier: start a Zap with Webhooks by Zapier → Catch Hook and copy the URL
- Your own endpoint: any public HTTPS endpoint that returns a
2xxstatus code
- It starts with
https:// - It points to a public host, not
localhostor a private network address - It contains no username or password. Put credentials in the header instead (see Step 2)
- It doesn’t redirect. LeadTrackr doesn’t follow redirects, so use the final URL
Step 2: Turn on the webhook in LeadTrackr
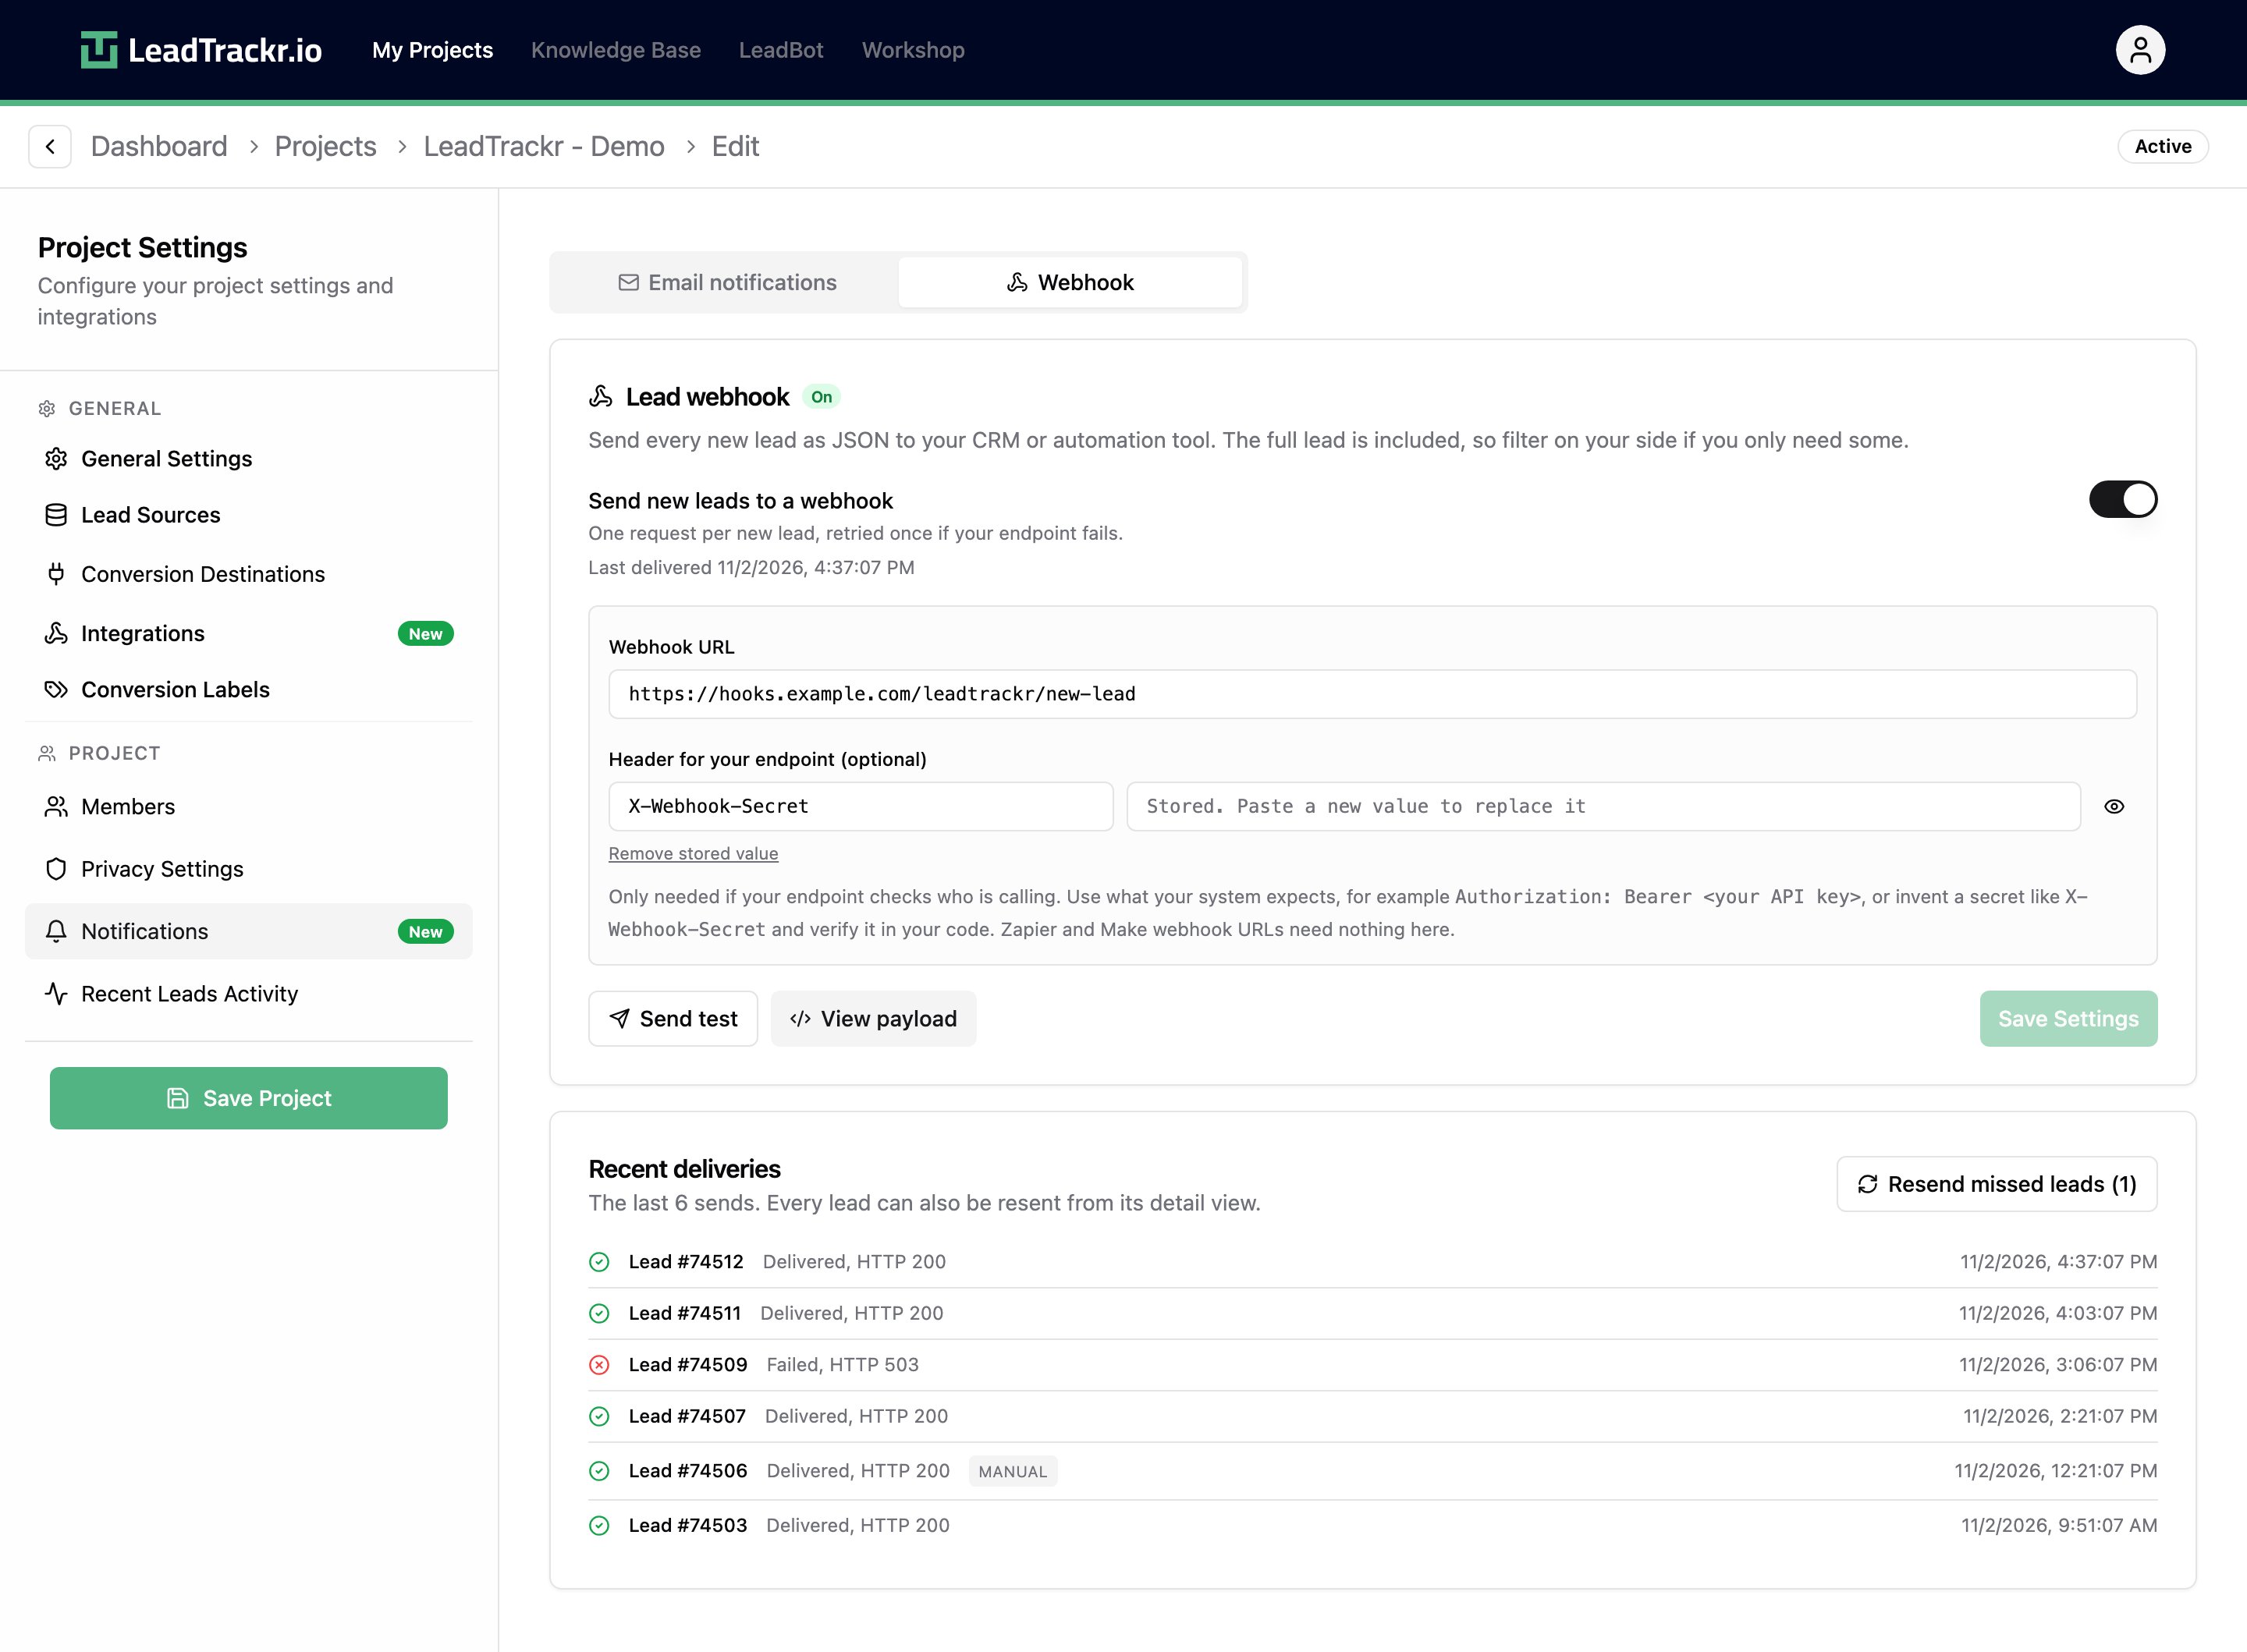
- Go to your Project Settings
- Open the Notifications tab
- Click the Webhook tab
- Turn on Send new leads to a webhook
- Paste your URL into Webhook URL
- Optional: add a Header for your endpoint, for example
AuthorizationwithBearer your-token, or a secret of your own such asX-Webhook-Secret - Click Save Settings
Step 3: Send a test
Click Send test after saving. LeadTrackr sends a test lead to your URL and shows the response from your endpoint. The test lead never contains real data. It has"id": 0, the form name Webhook test, the email test@example.com, and "trigger": "test". Use it to map fields in your automation tool, then filter it out (see Map the fields).
Step 4: Map the fields in your CRM
Click View payload to see the request headers and an example body.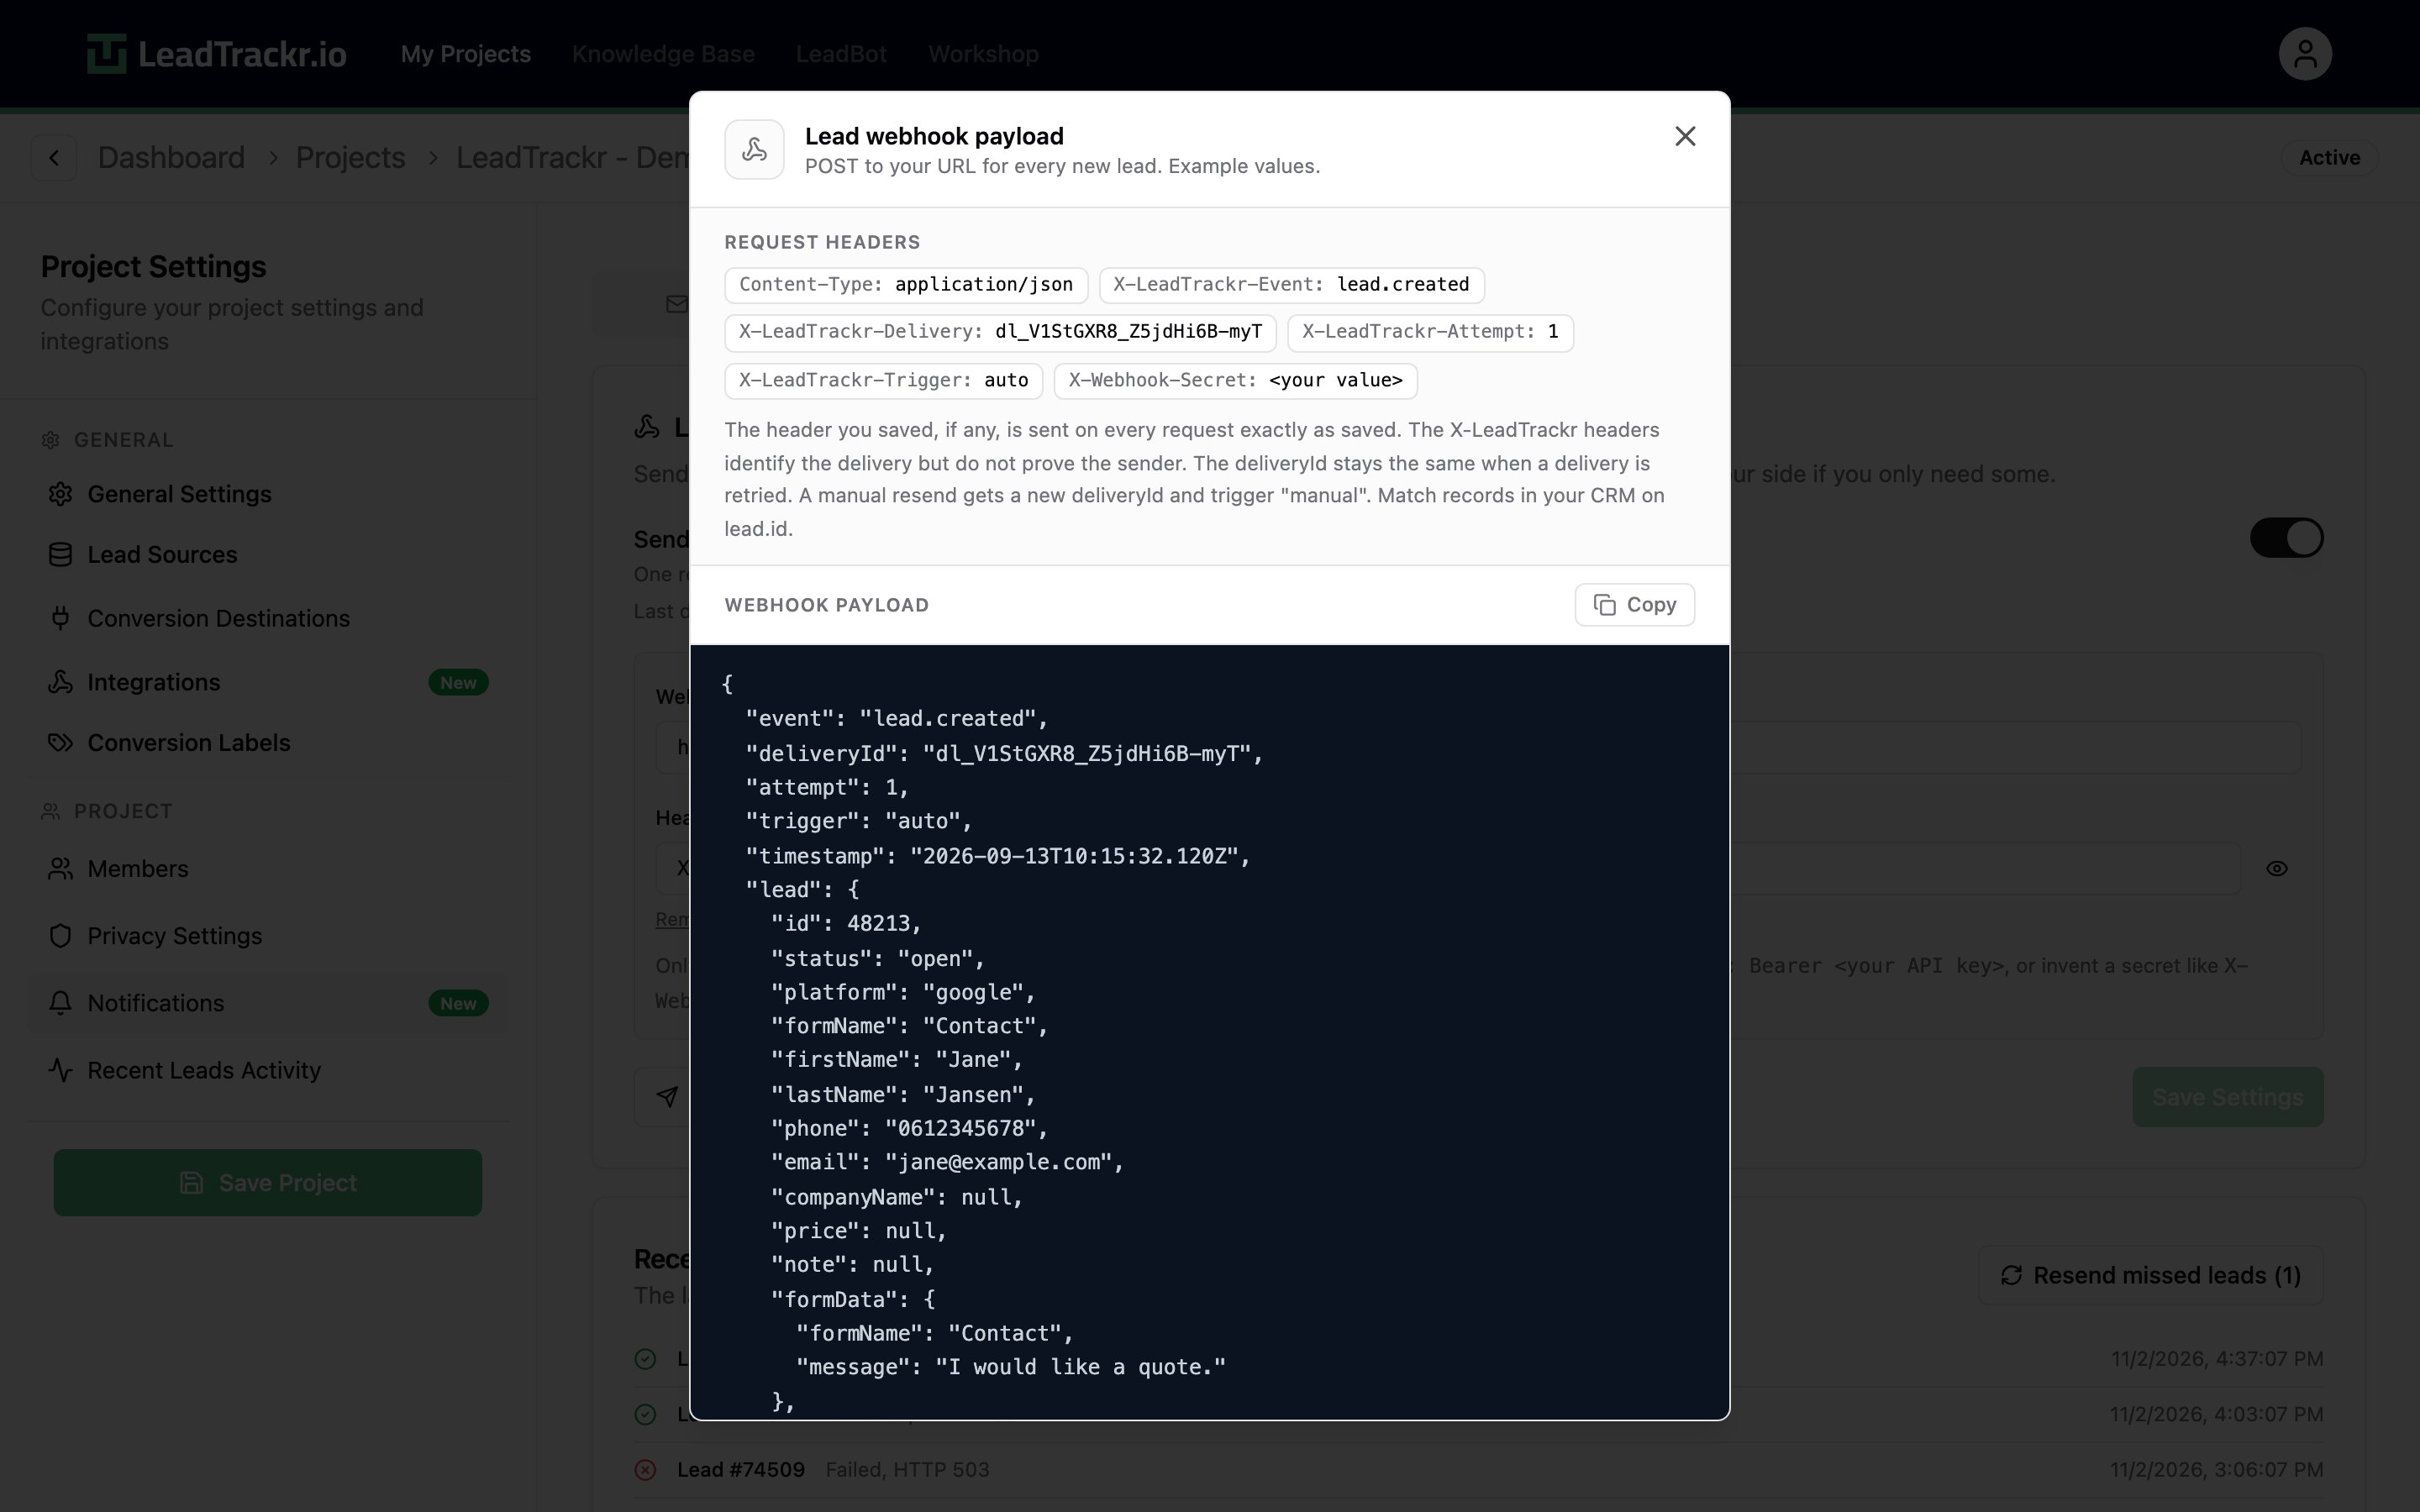
lead object has the same fields as the Get Lead response. The full lead is always sent, so pick the fields you need on your side.
Request headers
Every request carries these headers, plus your own header if you set one:
The
X-LeadTrackr-* headers identify a delivery, but they don’t prove who sent it. Use your own header to authenticate requests.
Prevent duplicate records
The same lead can reach your endpoint more than once, for example when a retry arrives after a slow first attempt, or when someone resends it by hand.- A retry keeps the same
deliveryId - A manual resend gets a new
deliveryIdand"trigger": "manual"
lead.id. If a record with that ID already exists, update it or skip it instead of creating a new one.
Step 5: Send the deal status back to LeadTrackr
Storelead.id in a field on the contact or deal. When the deal reaches a stage you want to report to your ad platforms, such as an appointment, a proposal, or a won deal, let your CRM or automation call Update Lead Status with that leadId and the matching conversion label.
LeadTrackr then sends the offline conversion to Google Ads, Meta, and your other conversion destinations. The ad platforms learn which campaigns bring in deals instead of form fills.
Delivery, retries, and pauses
LeadTrackr tries to deliver every lead twice at most:- First attempt: right after the lead comes in, with a 4 second timeout
- One retry: 2 minutes later, with a 10 second timeout
2xx status code within that time. Do the slow work, such as CRM calls, after you reply, or use an automation tool that replies straight away.
After 10 leads in a row fail, LeadTrackr pauses the webhook and shows the last error in the settings. New leads are then not sent. Fix your endpoint and click Resume. Changing the URL or the header also resumes the webhook.
Resend leads
- Resend missed leads: in the Recent deliveries list, this button queues the newest failed or skipped leads again, up to 500 at a time. They are sent within a minute
- Resend to CRM: every lead shows its webhook status in the lead details. Click Resend to CRM to send that one lead again

When a lead is not sent
The webhook fires once, forlead.created. It doesn’t fire when:
- A repeat submission from the same person is merged into an existing lead by lead matching. The CRM already has that lead
- A submission is an exact duplicate of an existing lead
- Leads are added through a lead import
- The webhook is turned off or paused, or the project’s plan doesn’t include webhooks. These leads show as Not sent and you can resend them later
Troubleshooting
What’s next?
Update Lead Status
Send the deal status from your CRM back to LeadTrackr
Set Up Conversion Labels
Link CRM stages to conversion events in your ad platforms