Step 1: Add the LeadTrackr Tag to Your GTM Container
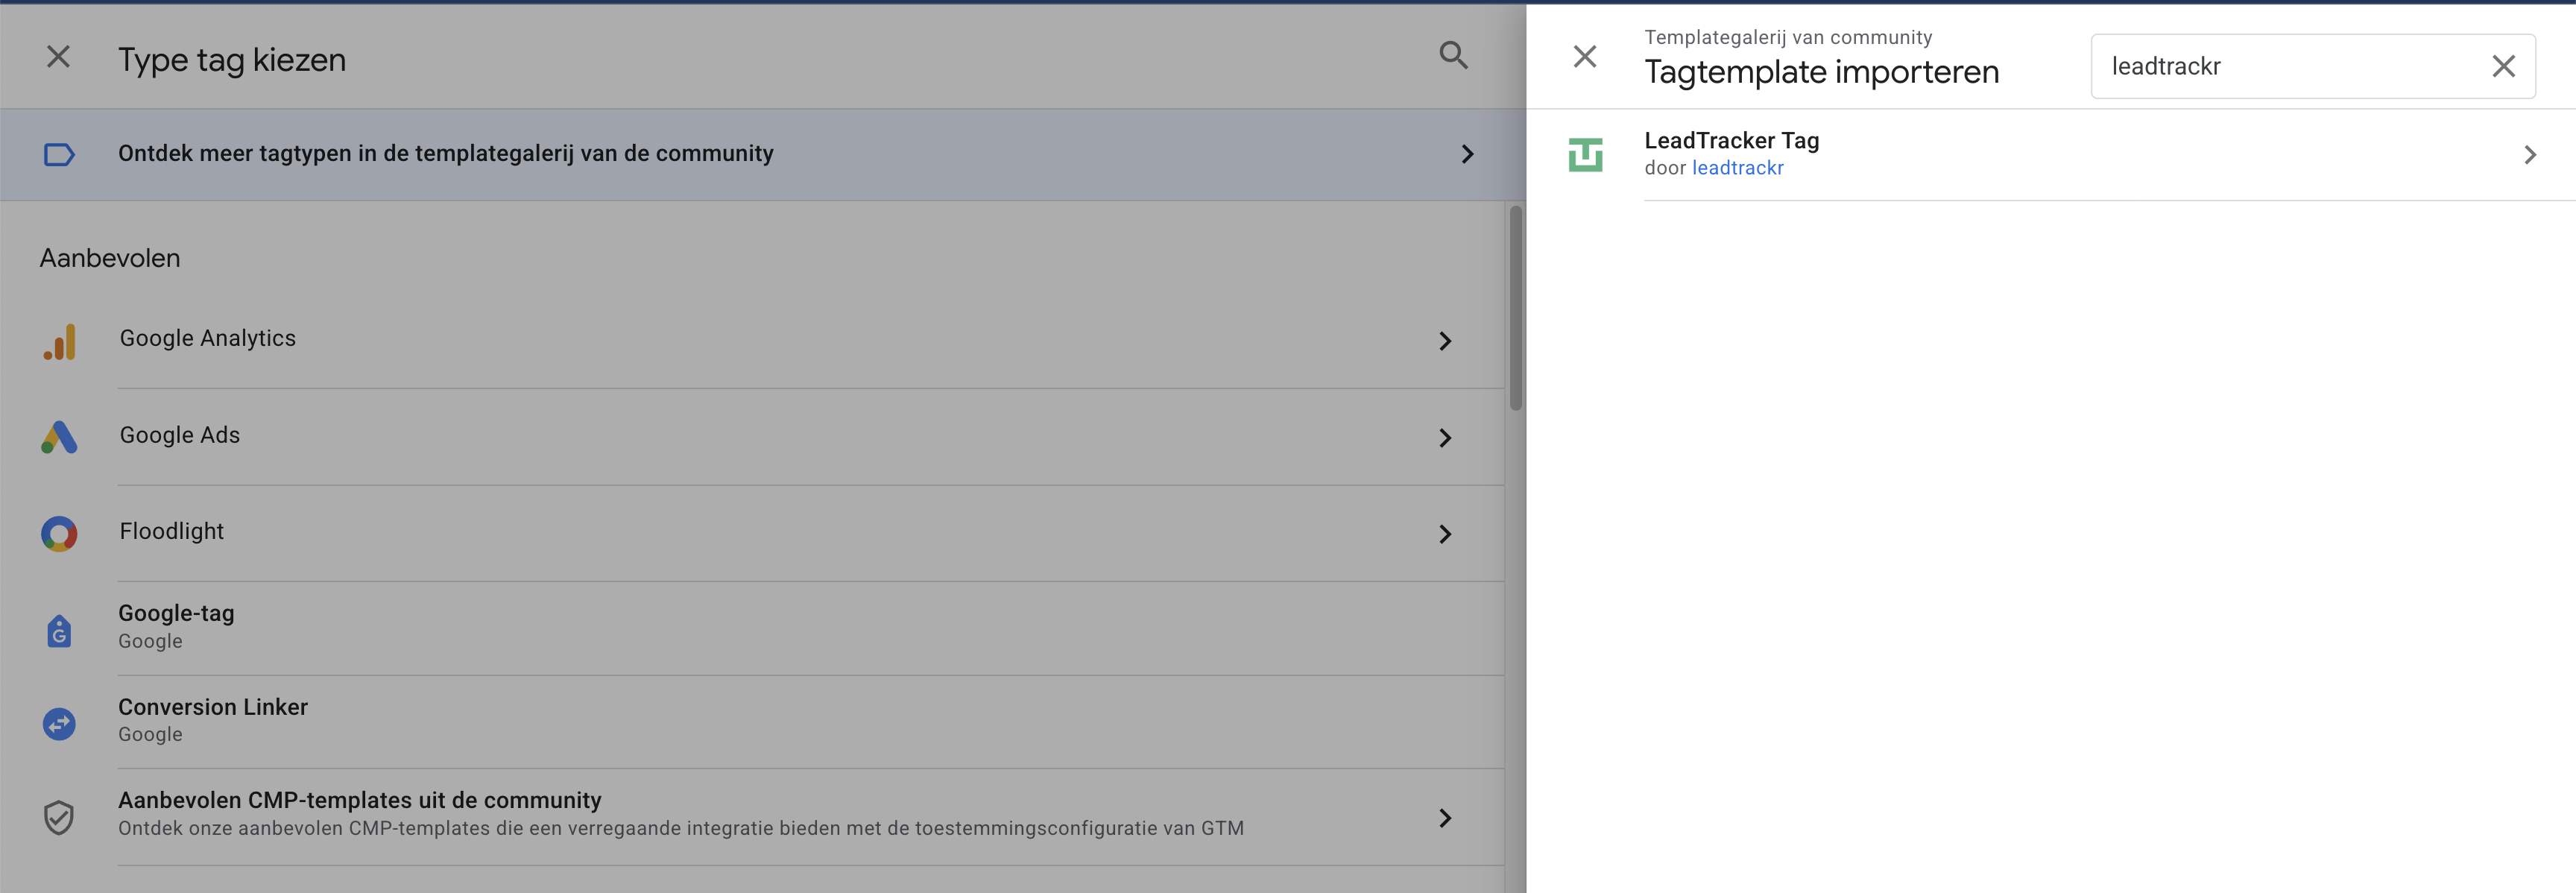
- Go to your container in Tag Manager
- Click Templates → Search Gallery
- Look for LeadTrackr tag
- Click Add to Workspace
Step 2: Create a New LeadTrackr Tag
- Go to Tags and click New
- Select LeadTrackr Tag as the tag type
- Choose Channel Flow Tracker as the tag type

Step 3: Add a Trigger
Attach an All Pages trigger to the LeadTrackr tag. This ensures the Channel Flow Tracker can capture UTM parameters and build the full user journey before a lead is submitted.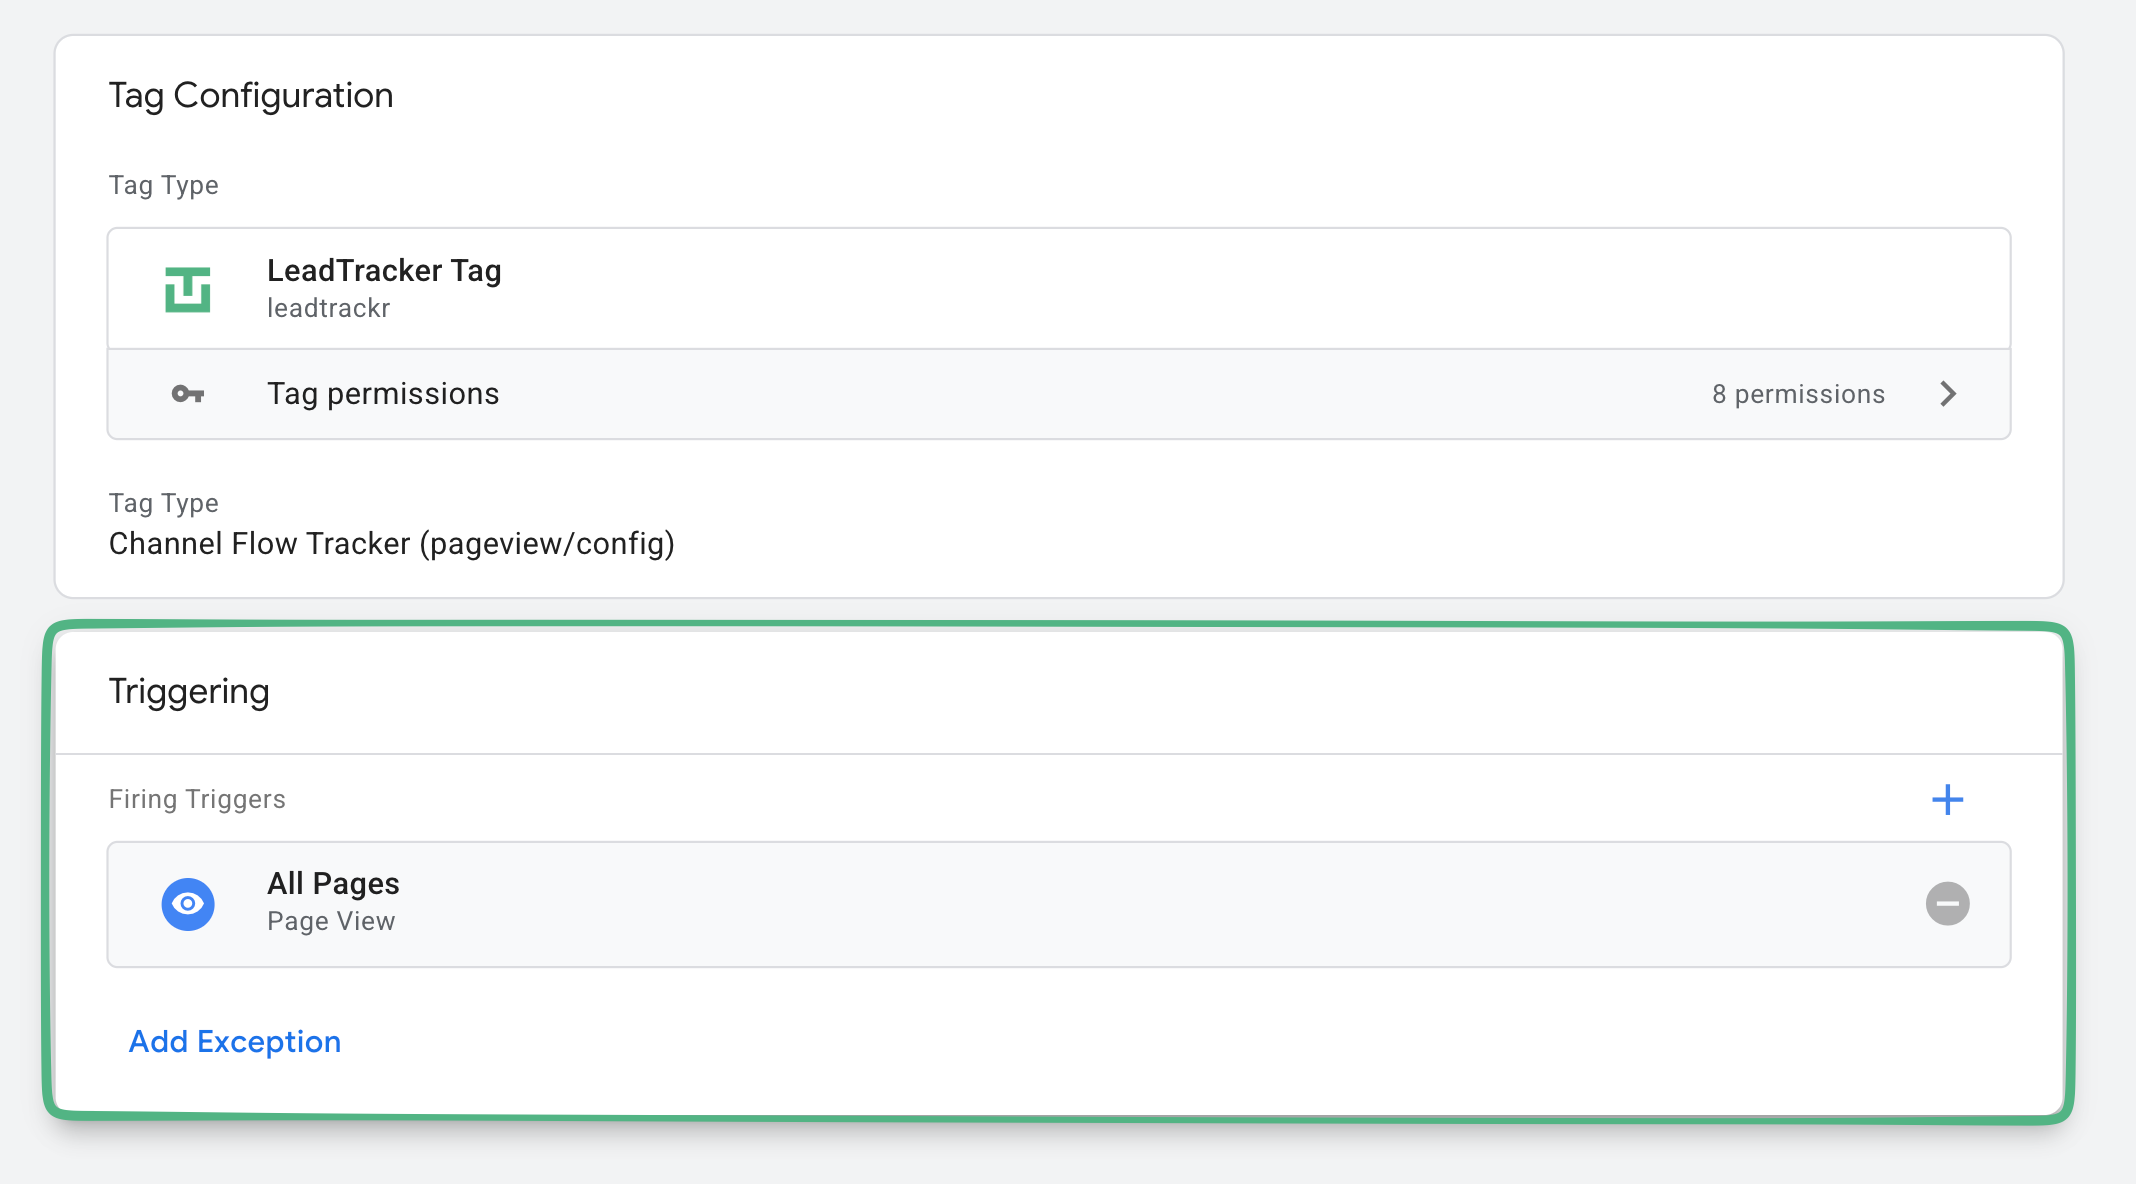
Step 4: Enable UTM Tracking in Your Ad Platforms
To get accurate source/medium/channel data in LeadTrackr, make sure UTM parameters are added to your ads. The tag saves the following parameters:utm_sourceutm_mediumutm_campaignutm_contentutm_term
Step 5: Publish Your Container
Once your tag and trigger are configured, publish your GTM container. Your channel flow tracking has now been set up, and will be automatically included in new lead entries.What’s Next?
Now that your channel flow tracking is active, connect your conversion destinations to start sending qualified leads to your ad platforms.Set Up Google Ads Conversions
Send offline conversions to Google Ads
Set Up Meta Integration
Send offline conversions to Meta (Facebook)
Set Up GA4 Integration
Send offline conversions to Google Analytics 4
Set Up Conversion Labels
Link lead statuses to conversion events