Step 1: Open the Meta Integration Settings in LeadTrackr
- Go to your Project Settings
- Navigate to the Meta Integration tab
- Pixel ID
- Access Token
- Phone Number Country Code Fallback
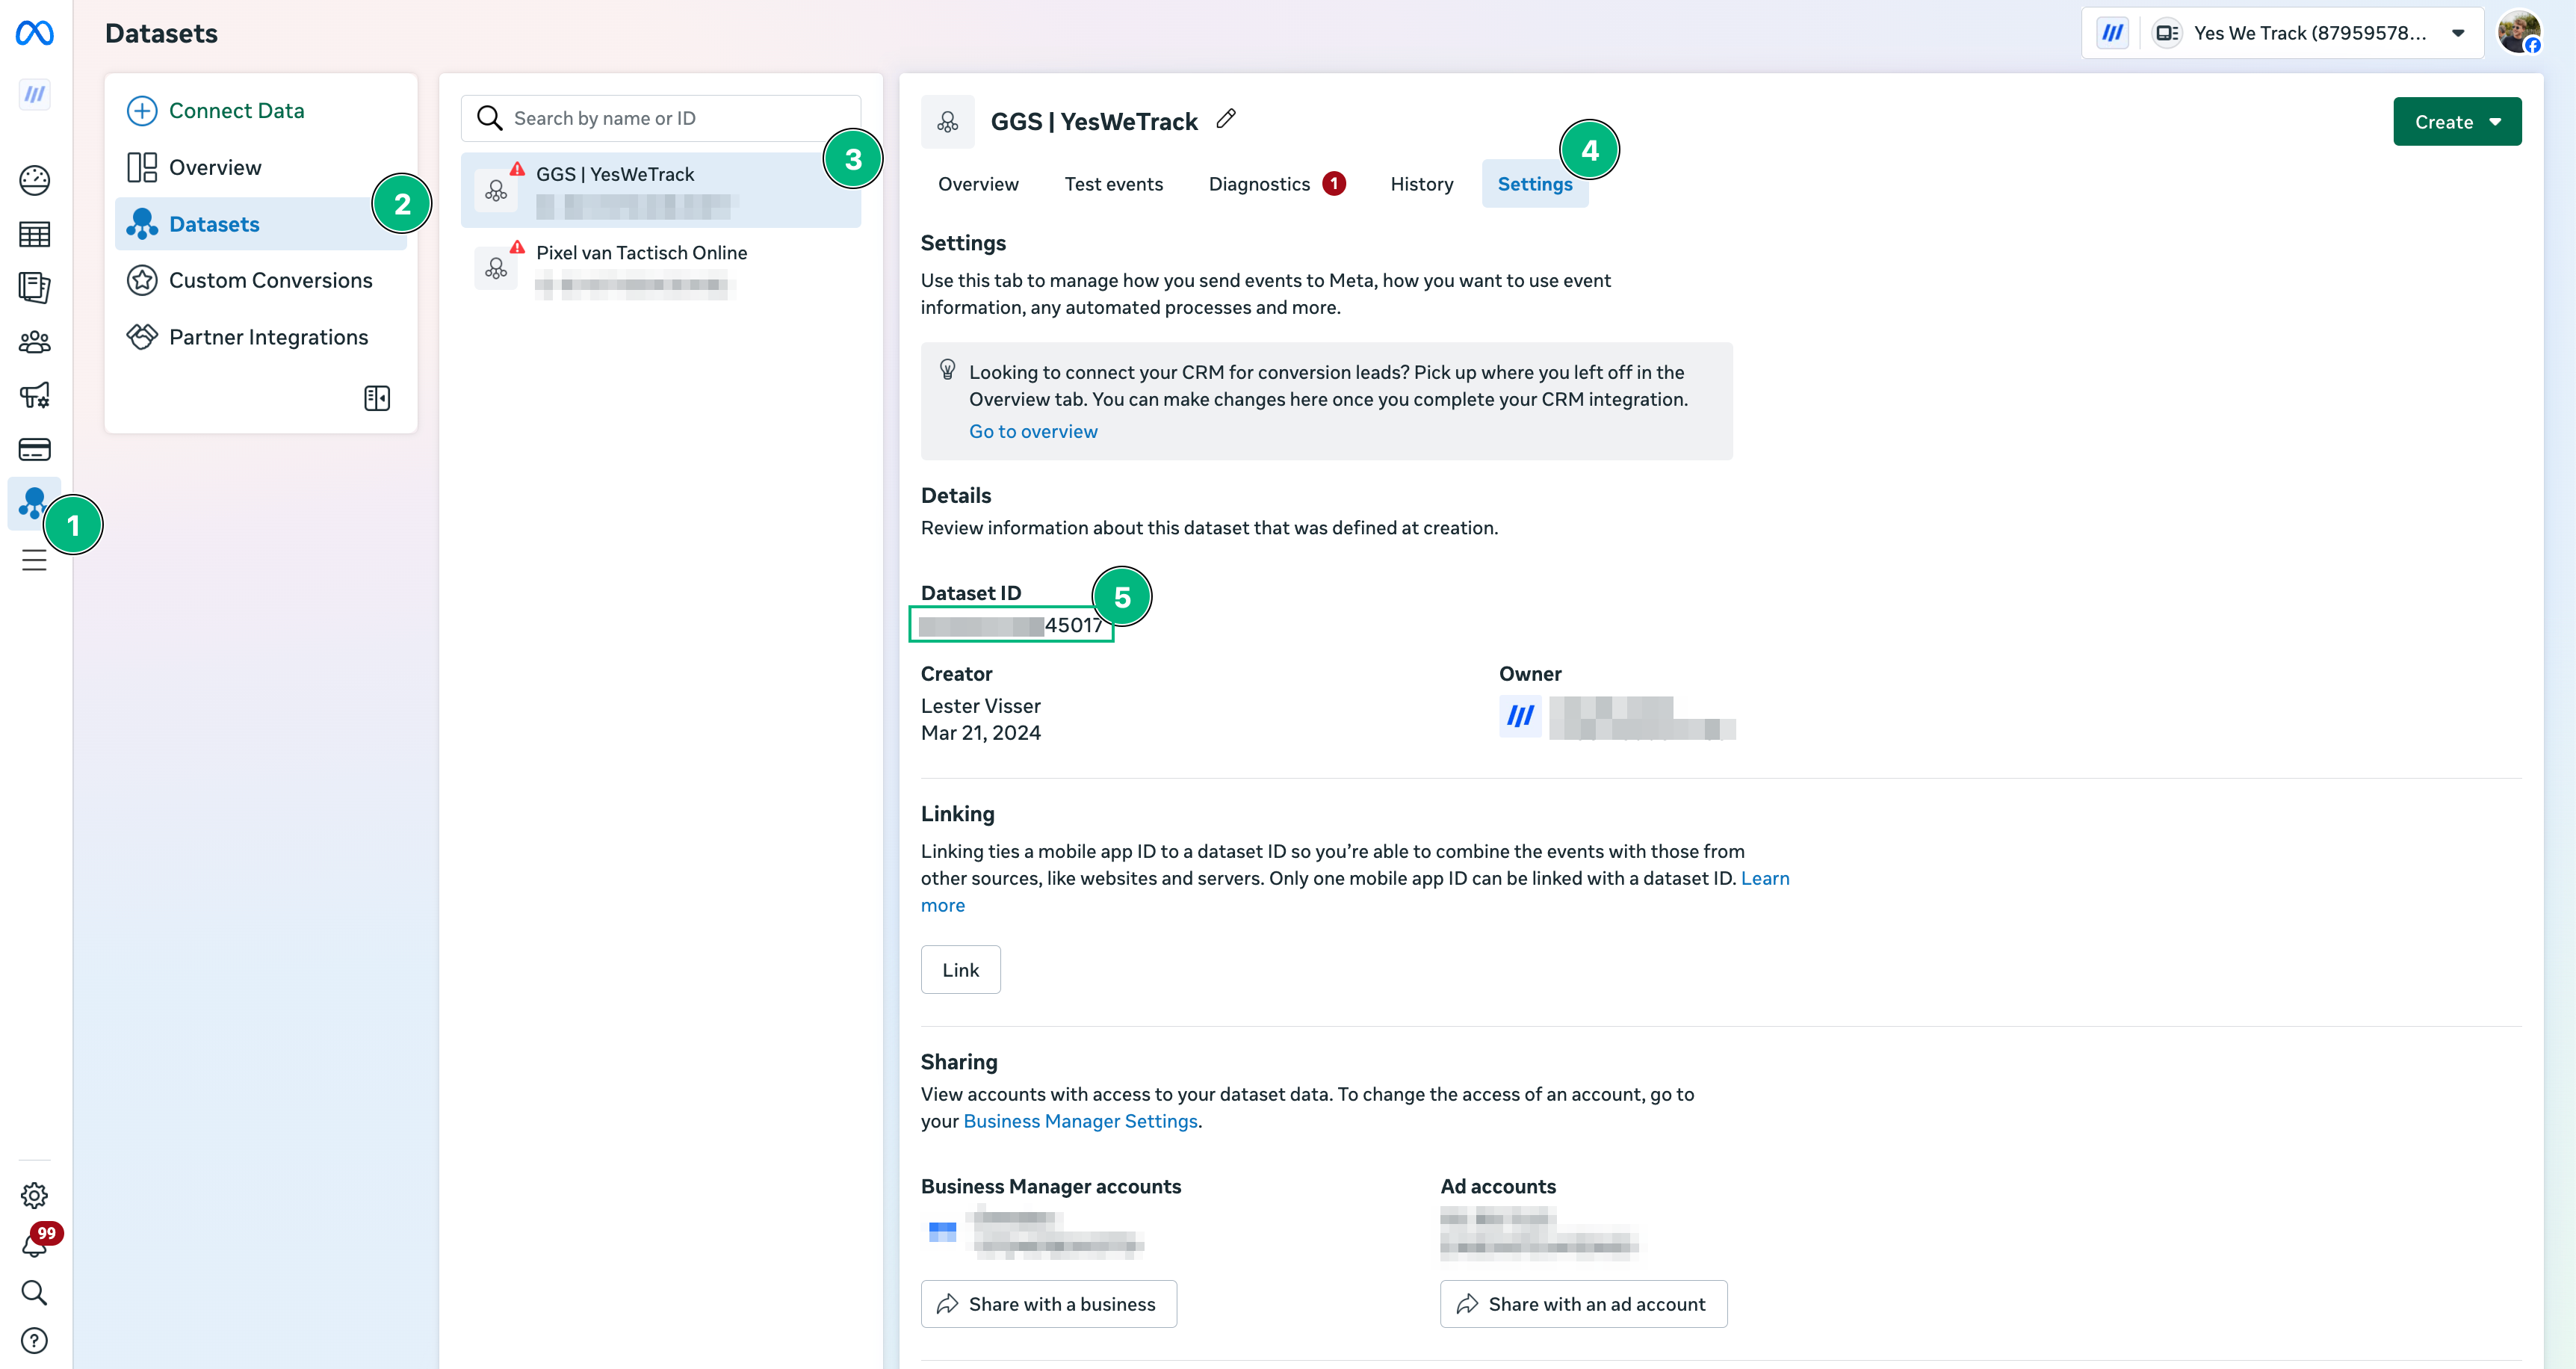
Step 2: Find Your Meta Data Set ID
To find your Pixel ID:- Go to Facebook Business Manager
- Navigate to: Events Manager → Data Sources → select your Pixel
- Click on the Settings tab
- Copy the DataSet ID
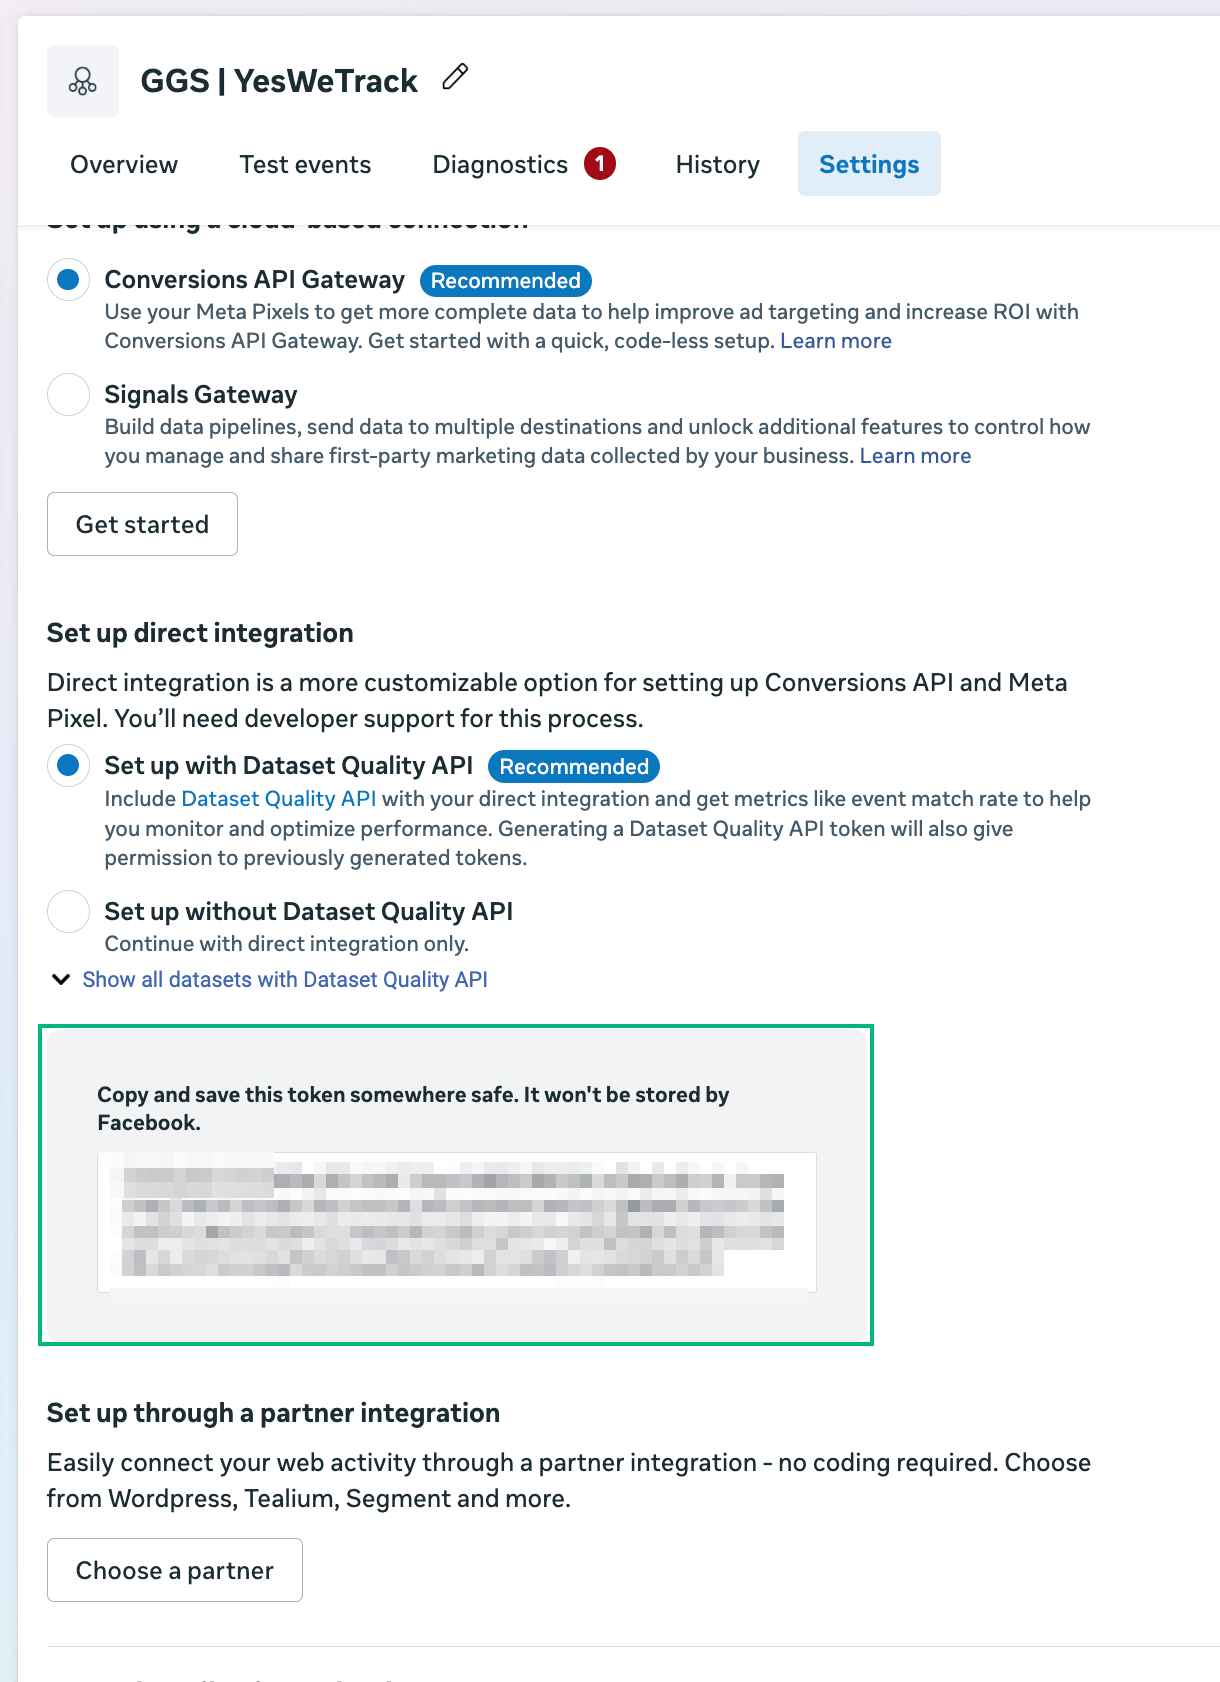
Step 3: Generate a Meta Access Token
Meta uses access tokens to authorize offline conversion events sent via the Conversions API. To generate your Access Token:- In Events Manager, in the same data set setting where you got your pixel ID
- Under Settings, scroll down to the section called Conversions API
- Click Generate Access Token
- Copy the generated token
Step 4: Add a Phone Number Country Code Fallback
Meta requires phone numbers to be sent in international format (e.g. +31, +1). If a phone number in your lead data doesn’t include a country code, LeadTrackr will automatically add the fallback code you set here. Example: If most of your leads are Dutch, select+31.
That’s It!
Your Meta (Facebook) integration is now ready to send offline conversions via the Conversions API.What’s Next?
Your Meta integration is ready — now link your lead statuses to Meta events using conversion labels.Set Up Conversion Labels
Link your lead statuses to Meta conversion events