> ## Documentation Index
> Fetch the complete documentation index at: https://leadtrackr.io/docs/llms.txt
> Use this file to discover all available pages before exploring further.
# Connect WordPress Forms as a Lead Source
> Learn how to set up a lead source using the LeadTrackr plugin for WordPress.
If you're **not using WordPress** or your form provider isn't supported, you can also set up a lead source using [Google Tag Manager (GTM)](/docs/lead-sources/gtm).
**Why the WordPress plugin is the recommended setup.** The plugin sends form submissions **server-to-server**, which means:
* 100% of submissions are tracked reliably
* Tracking is not blocked by adblockers, ITP, or browser limitations
* No client-side scripts are required
Currently supported WordPress form plugins:
* GravityForms
* ContactForm 7
* Elementor
* WPForms
* Divi forms
Is your form plugin not supported yet? Let us know at [support@leadtrackr.io](mailto:support@leadtrackr.io), we'd love to hear from you and may add it to our roadmap!
## Step 1: Install the LeadTrackr Plugin
1. In your WordPress dashboard, go to **Plugins**
2. Click **Add New Plugin**
3. Search for **LeadTrackr**
4. Click **Install Now**
5. Then click **Activate**
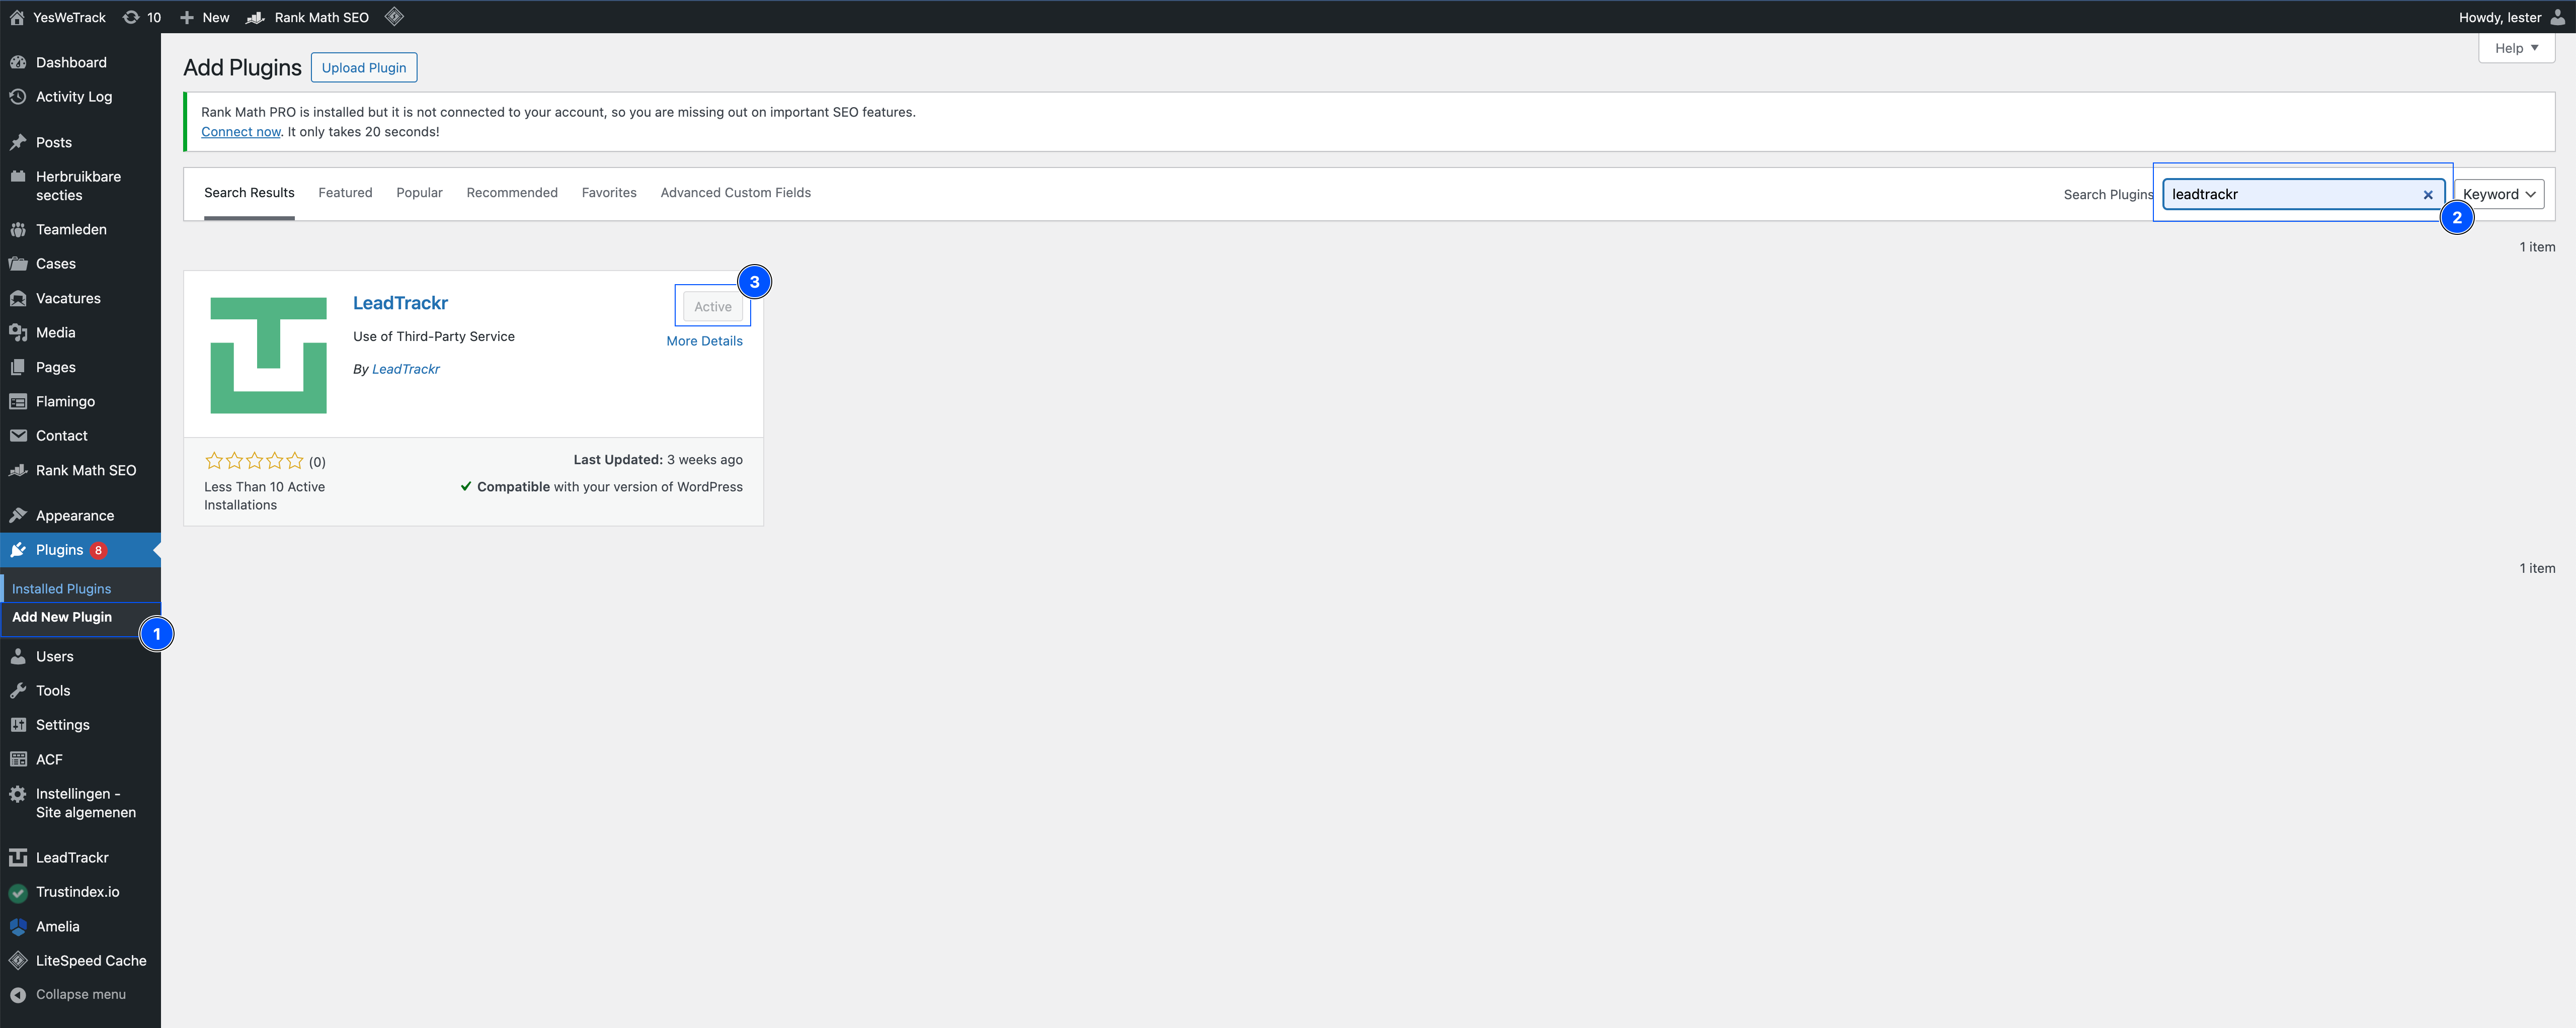 Once activated, you'll see **LeadTrackr** appear in your admin menu.
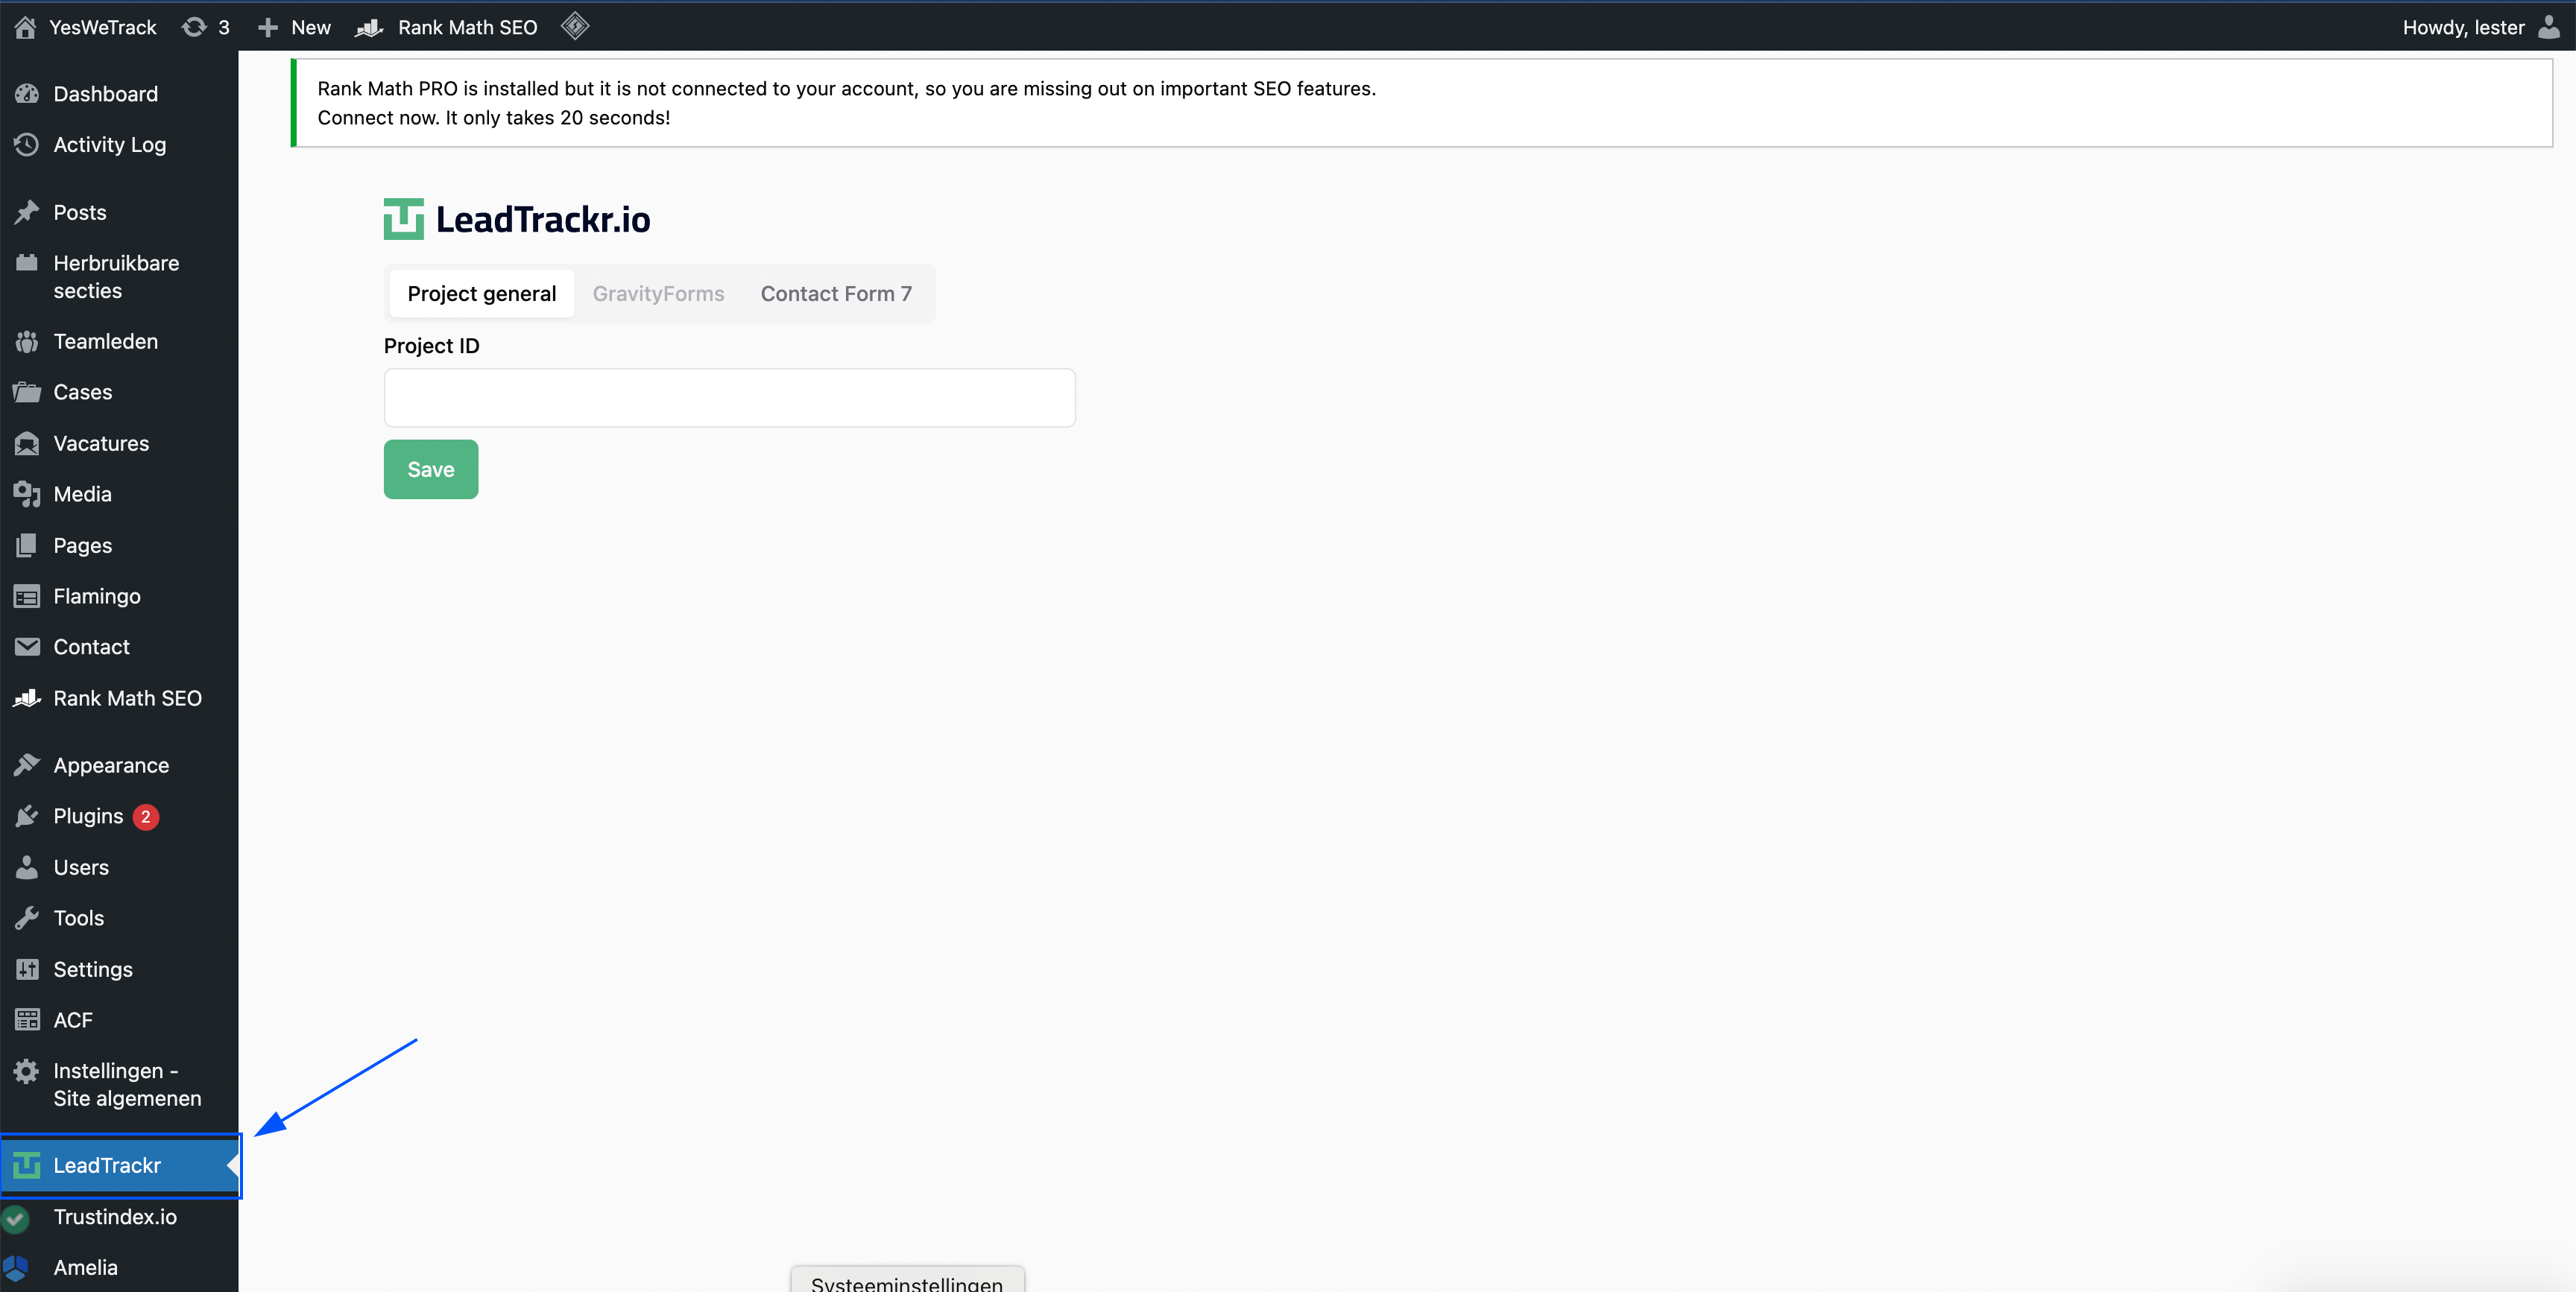 ## Step 2: Connect Your Project
To connect your WordPress site to your LeadTrackr account:
1. Go to [app.leadtrackr.io/dashboard/projects](https://app.leadtrackr.io/dashboard/projects)
2. Open the project you want to connect
3. In the URL of the page, you'll find your **Project ID**
## Step 2: Connect Your Project
To connect your WordPress site to your LeadTrackr account:
1. Go to [app.leadtrackr.io/dashboard/projects](https://app.leadtrackr.io/dashboard/projects)
2. Open the project you want to connect
3. In the URL of the page, you'll find your **Project ID**
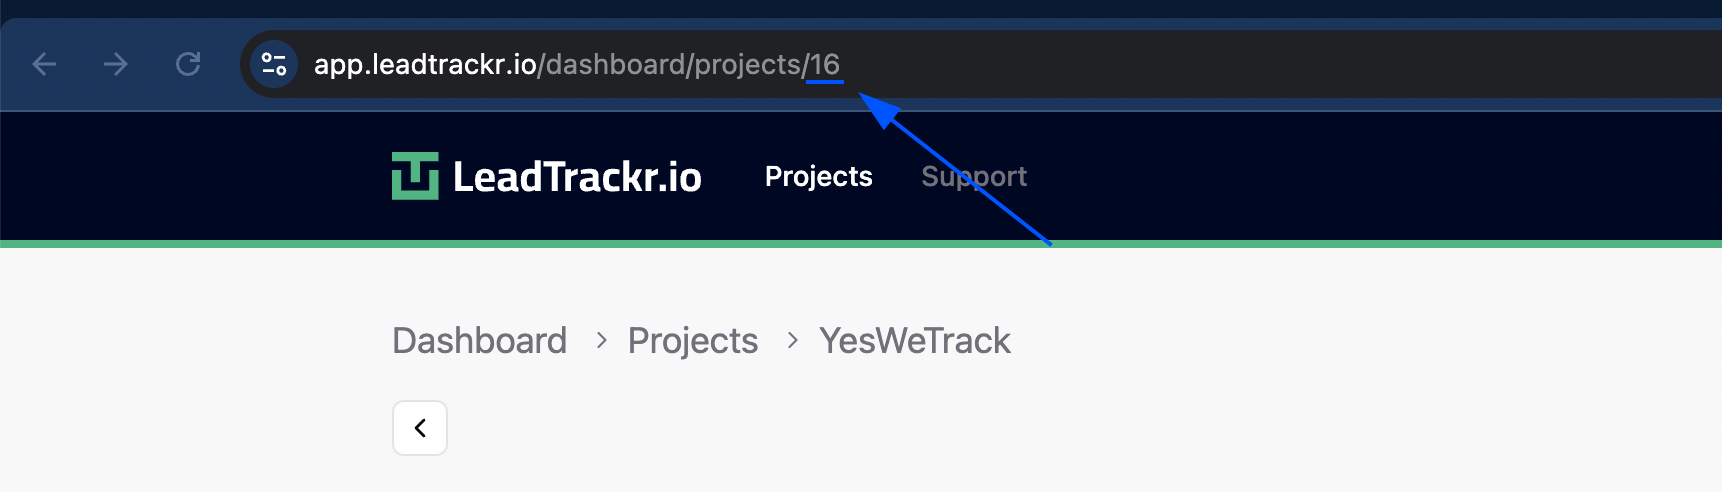 **Example:** If the URL is `https://app.leadtrackr.io/projects/16`, your project ID is `16`.
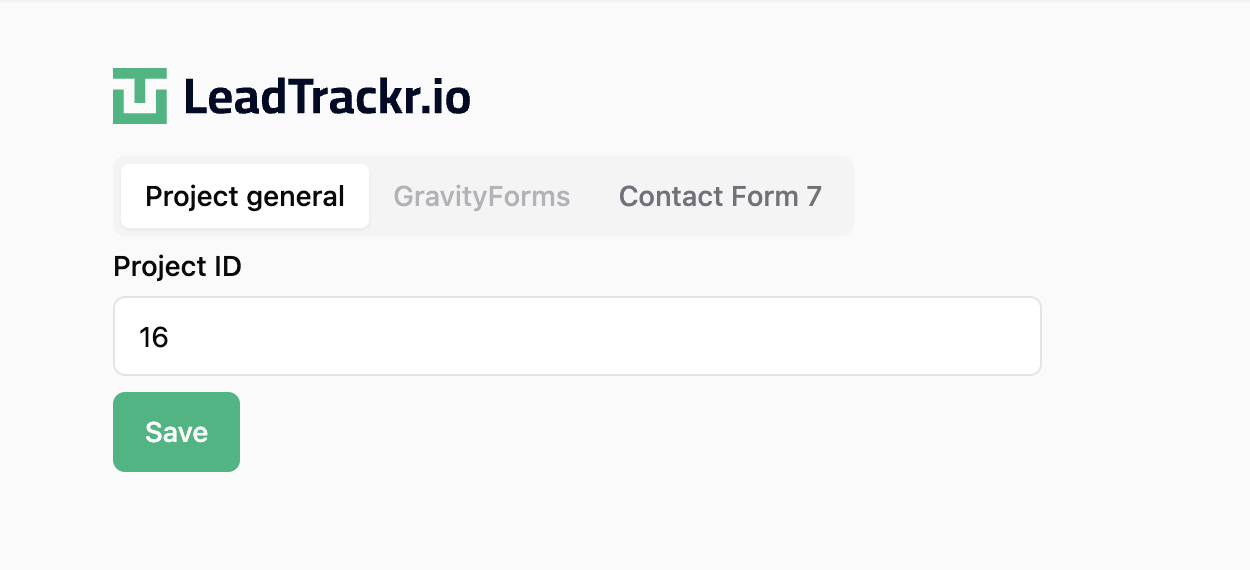
Enter this number in the **Project ID** field in the plugin settings and hit **Save**.
**Example:** If the URL is `https://app.leadtrackr.io/projects/16`, your project ID is `16`.
Enter this number in the **Project ID** field in the plugin settings and hit **Save**.
 ## Step 3: Select Your Form Provider
LeadTrackr automatically detects which supported form plugins are installed on your WordPress site.
In the plugin settings:
* Select your form provider (e.g. **Contact Form 7**, **Elementor**, etc.)
* Navigate to the provider tab in the plugin
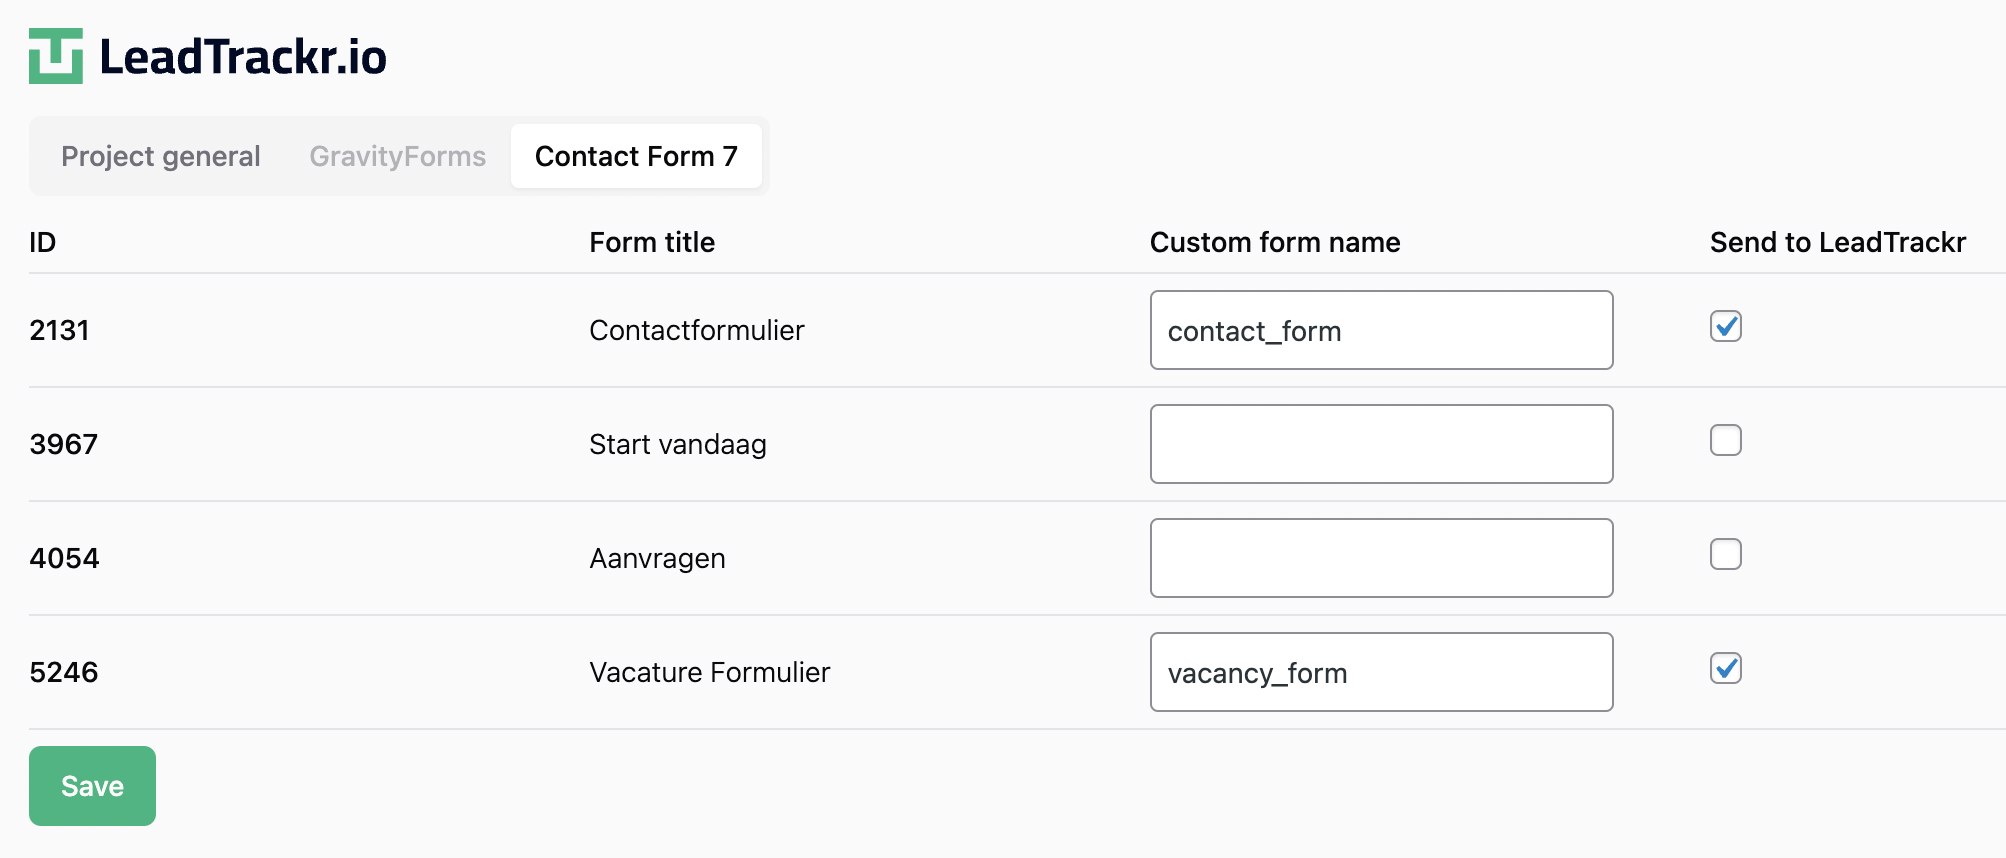
## Step 4: Enable Tracking for Your Forms
For each form you want to track:
1. Give the form a **recognizable name**
2. Enable tracking by checking the box
3. Click **Save**
Your forms are now connected and all new submissions will be sent to LeadTrackr for qualification and conversion tracking.
## Step 3: Select Your Form Provider
LeadTrackr automatically detects which supported form plugins are installed on your WordPress site.
In the plugin settings:
* Select your form provider (e.g. **Contact Form 7**, **Elementor**, etc.)
* Navigate to the provider tab in the plugin
## Step 4: Enable Tracking for Your Forms
For each form you want to track:
1. Give the form a **recognizable name**
2. Enable tracking by checking the box
3. Click **Save**
Your forms are now connected and all new submissions will be sent to LeadTrackr for qualification and conversion tracking.
 ## What's Next?
Nice work, your forms are now connected to LeadTrackr!
Next, set up the Channel Flow Tracker to capture the full user journey (UTM parameters, landing pages, referrers) alongside your form submissions. Then connect your conversion destinations to start sending offline conversions.
Track the full user journey with UTM parameters
Send offline conversions to Google Ads
Send offline conversions to Meta (Facebook)
Send offline conversions to Google Analytics 4
## What's Next?
Nice work, your forms are now connected to LeadTrackr!
Next, set up the Channel Flow Tracker to capture the full user journey (UTM parameters, landing pages, referrers) alongside your form submissions. Then connect your conversion destinations to start sending offline conversions.
Track the full user journey with UTM parameters
Send offline conversions to Google Ads
Send offline conversions to Meta (Facebook)
Send offline conversions to Google Analytics 4