> ## Documentation Index
> Fetch the complete documentation index at: https://leadtrackr.io/docs/llms.txt
> Use this file to discover all available pages before exploring further.
# Setting Up a Lead Source in Server-side GTM (sGTM)
> Send form submissions to LeadTrackr using the Leads API tag in Server-side Google Tag Manager.
If you're not using our WordPress plugin — or your form provider isn't supported — you can send form submissions to LeadTrackr using the **Leads API tag in Server-side Google Tag Manager (sGTM)**.
**Using WordPress?** If your form provider is supported by our [WordPress plugin](/docs/lead-sources/wordpress-forms), we strongly recommend using it instead of the sGTM setup.
The plugin sends form submissions **server-to-server**, which means:
* 100% of submissions are tracked reliably
* Tracking is not blocked by adblockers, ITP, or browser limitations
* No client-side scripts are required
## Step 1: Add the LeadTrackr Tag Template to Your sGTM Container
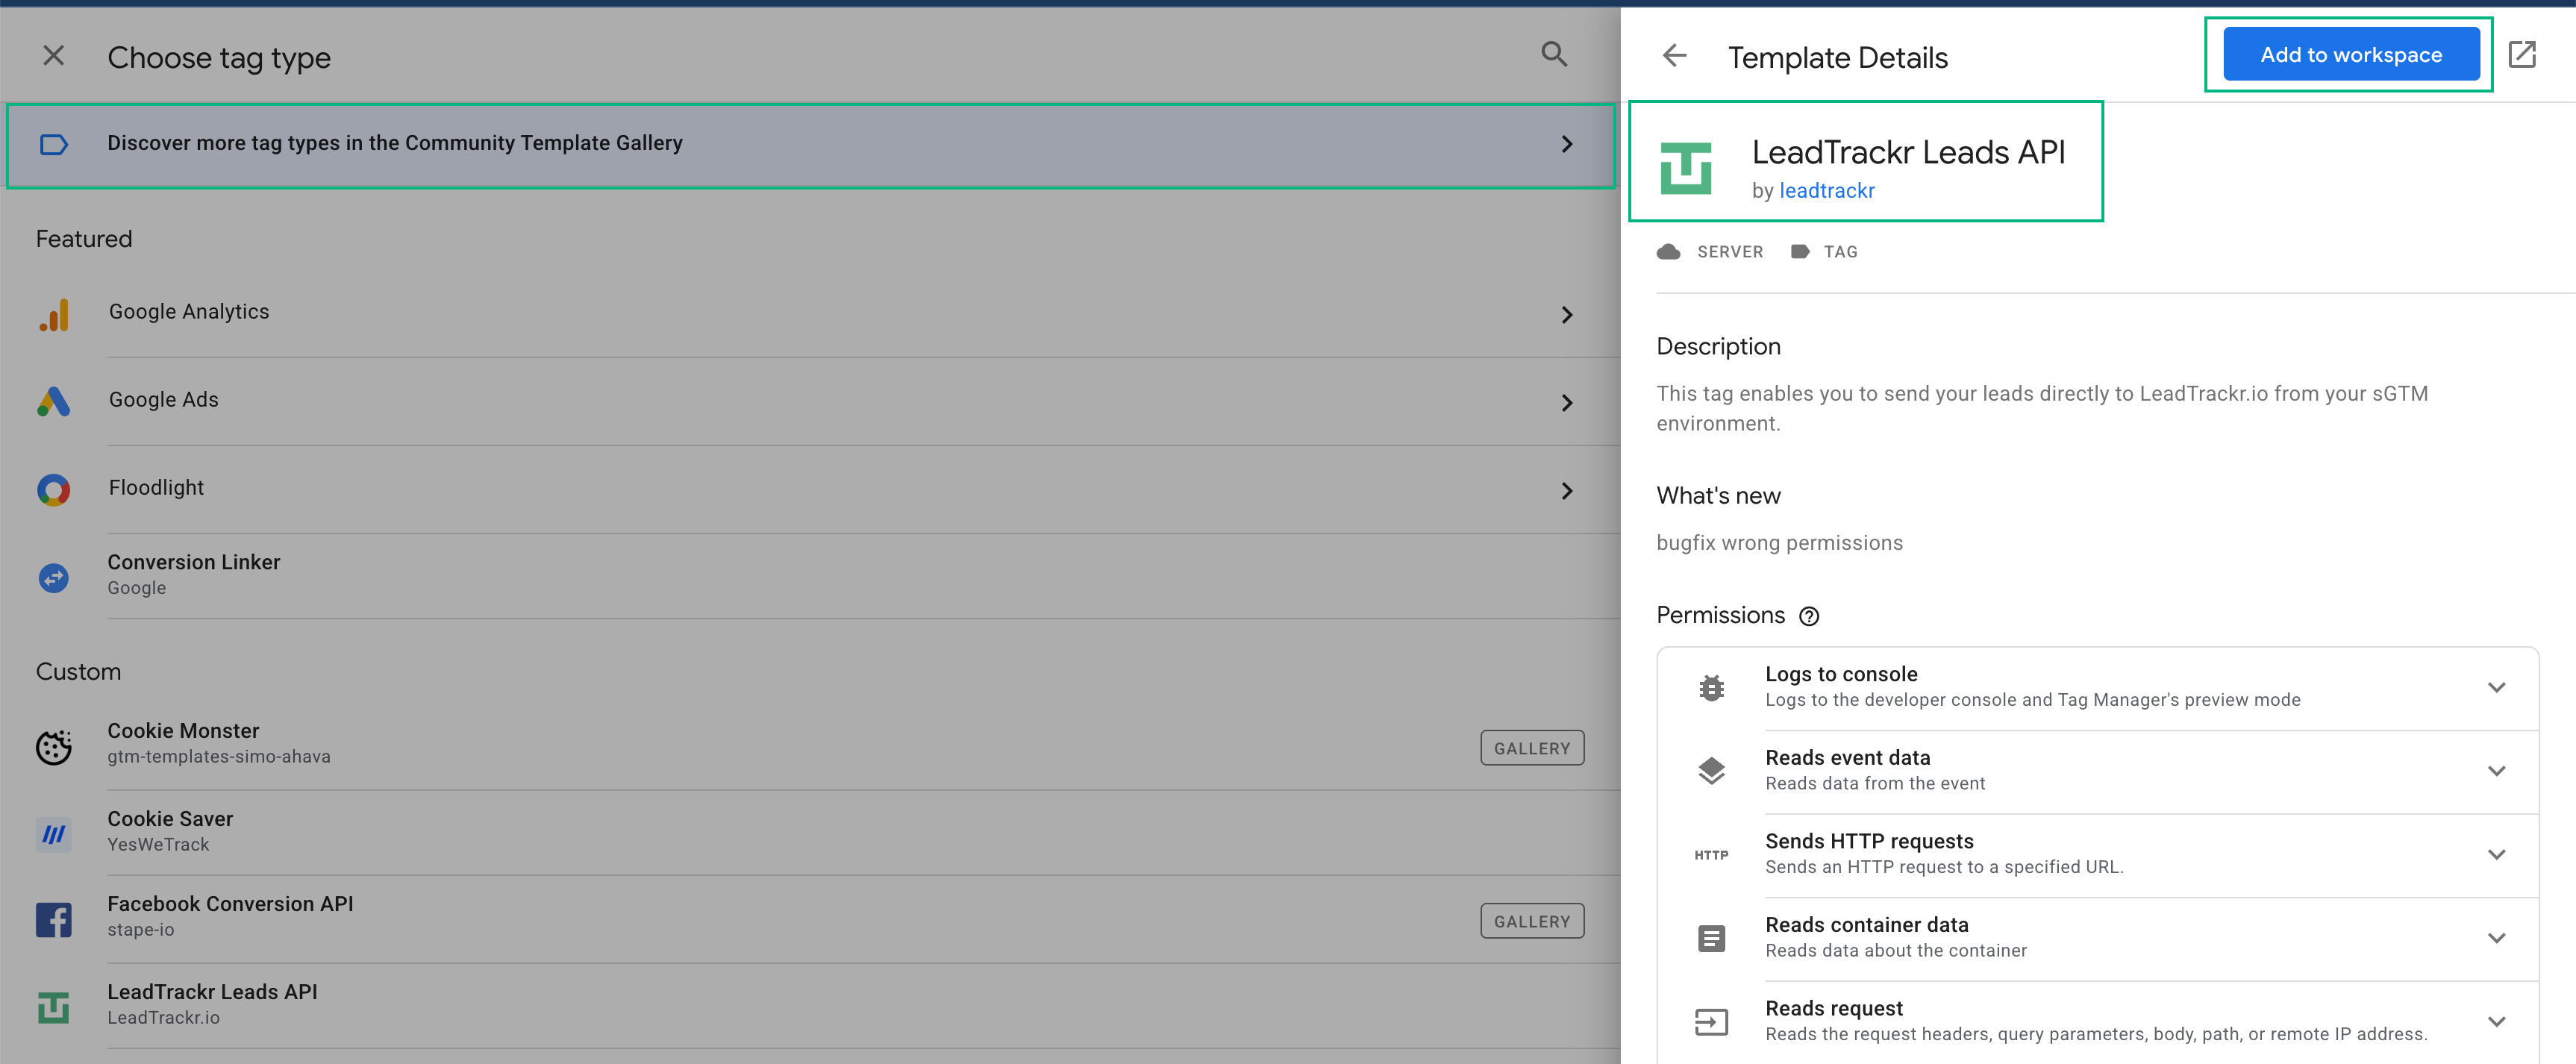
1. Go to your **server container** in Tag Manager
2. Click **Templates** → **Search Gallery**
3. Look for **LeadTrackr Leads API**
4. Click **Add to Workspace**
 ## Step 2: Create a New LeadTrackr Tag
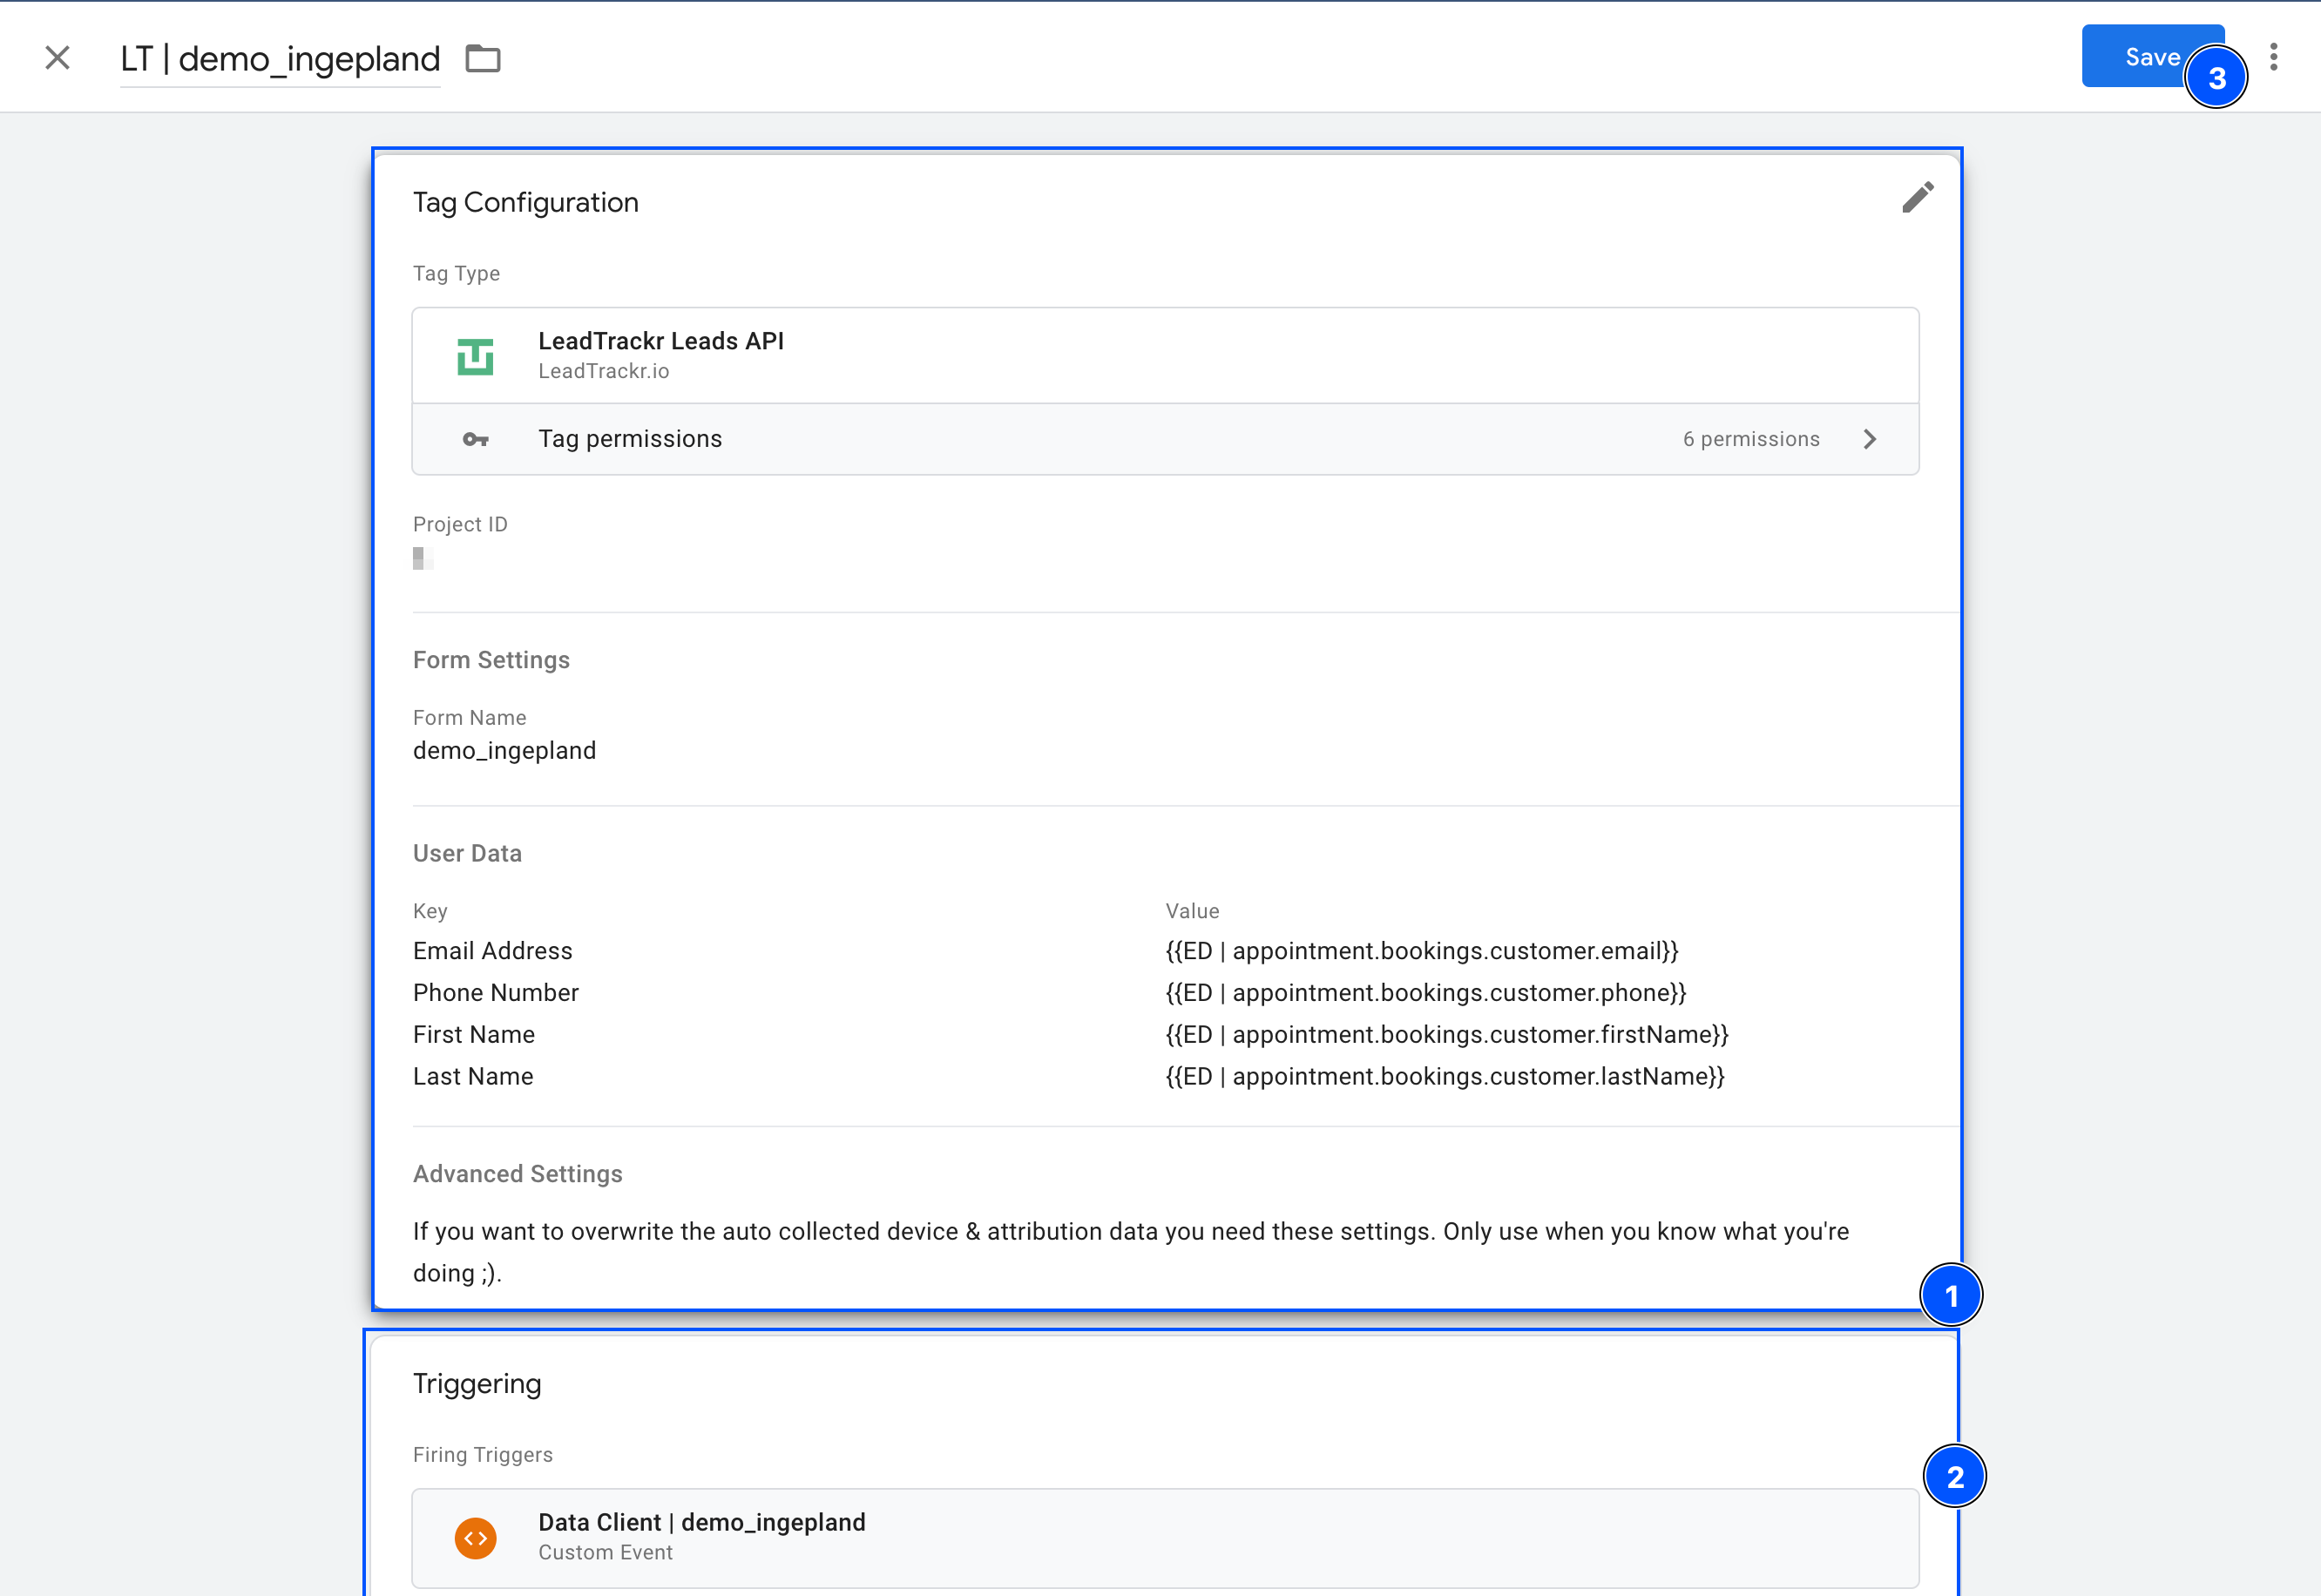
1. Go to **Tags** and click **New**
2. Select **LeadTrackr Leads API** as the tag type
3. Fill in the required fields:
* **Project ID**
* **Form name** (descriptive label)
* Any custom form fields or user data fields you want to pass along (e.g. email, phone, message)
### Where to Find Your Project ID
1. Go to [app.leadtrackr.io/dashboard/projects](https://app.leadtrackr.io/dashboard/projects)
2. Open the project you want to connect
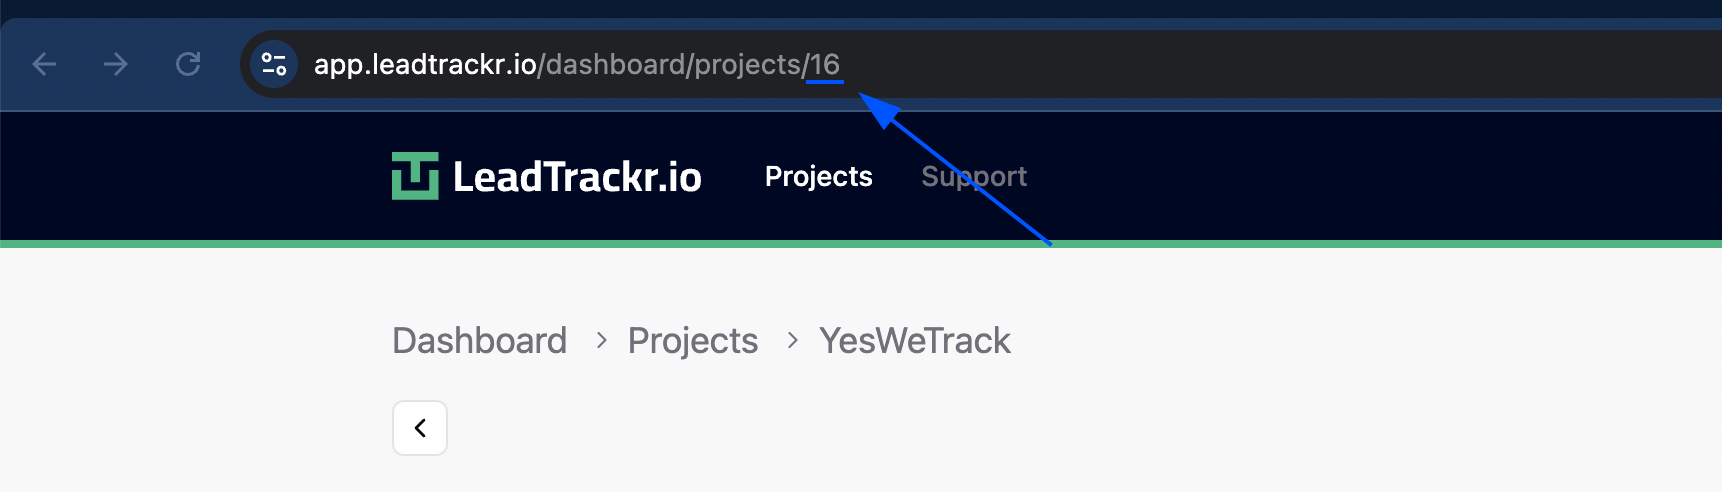
3. Your **Project ID** is visible in the URL
* Example: `https://app.leadtrackr.io/projects/16` → project ID = `16`
## Step 2: Create a New LeadTrackr Tag
1. Go to **Tags** and click **New**
2. Select **LeadTrackr Leads API** as the tag type
3. Fill in the required fields:
* **Project ID**
* **Form name** (descriptive label)
* Any custom form fields or user data fields you want to pass along (e.g. email, phone, message)
### Where to Find Your Project ID
1. Go to [app.leadtrackr.io/dashboard/projects](https://app.leadtrackr.io/dashboard/projects)
2. Open the project you want to connect
3. Your **Project ID** is visible in the URL
* Example: `https://app.leadtrackr.io/projects/16` → project ID = `16`
 ## Step 3: Add a Trigger
Attach a trigger that sends the lead event to LeadTrackr.
This is typically a **custom event**, such as `form_submission`, or an incoming HTTP request handled by your sGTM client.
## Step 3: Add a Trigger
Attach a trigger that sends the lead event to LeadTrackr.
This is typically a **custom event**, such as `form_submission`, or an incoming HTTP request handled by your sGTM client.
 ## Step 4: Publish Your Container
Once your tag and trigger are configured, **publish your sGTM container**.
Your form submissions are now sent to LeadTrackr via the Leads API, ready to be rated, qualified, and pushed to ad platforms as offline conversions.
## Other Lead Source Options
Use the WordPress plugin for server-to-server tracking
Use the client-side GTM tag instead
## What's Next?
With your lead source active, set up the Channel Flow Tracker and connect your conversion destinations.
Track the full user journey with UTM parameters
Send offline conversions to Google Ads
Send offline conversions to Meta (Facebook)
Send offline conversions to Google Analytics 4
## Step 4: Publish Your Container
Once your tag and trigger are configured, **publish your sGTM container**.
Your form submissions are now sent to LeadTrackr via the Leads API, ready to be rated, qualified, and pushed to ad platforms as offline conversions.
## Other Lead Source Options
Use the WordPress plugin for server-to-server tracking
Use the client-side GTM tag instead
## What's Next?
With your lead source active, set up the Channel Flow Tracker and connect your conversion destinations.
Track the full user journey with UTM parameters
Send offline conversions to Google Ads
Send offline conversions to Meta (Facebook)
Send offline conversions to Google Analytics 4