> ## Documentation Index
> Fetch the complete documentation index at: https://leadtrackr.io/docs/llms.txt
> Use this file to discover all available pages before exploring further.
# How to Set Up the Channel Flow Tracker
> Track the full user journey and UTM parameters before a lead is submitted using the Channel Flow Tracker.
## Step 1: Add the LeadTrackr Tag to Your GTM Container
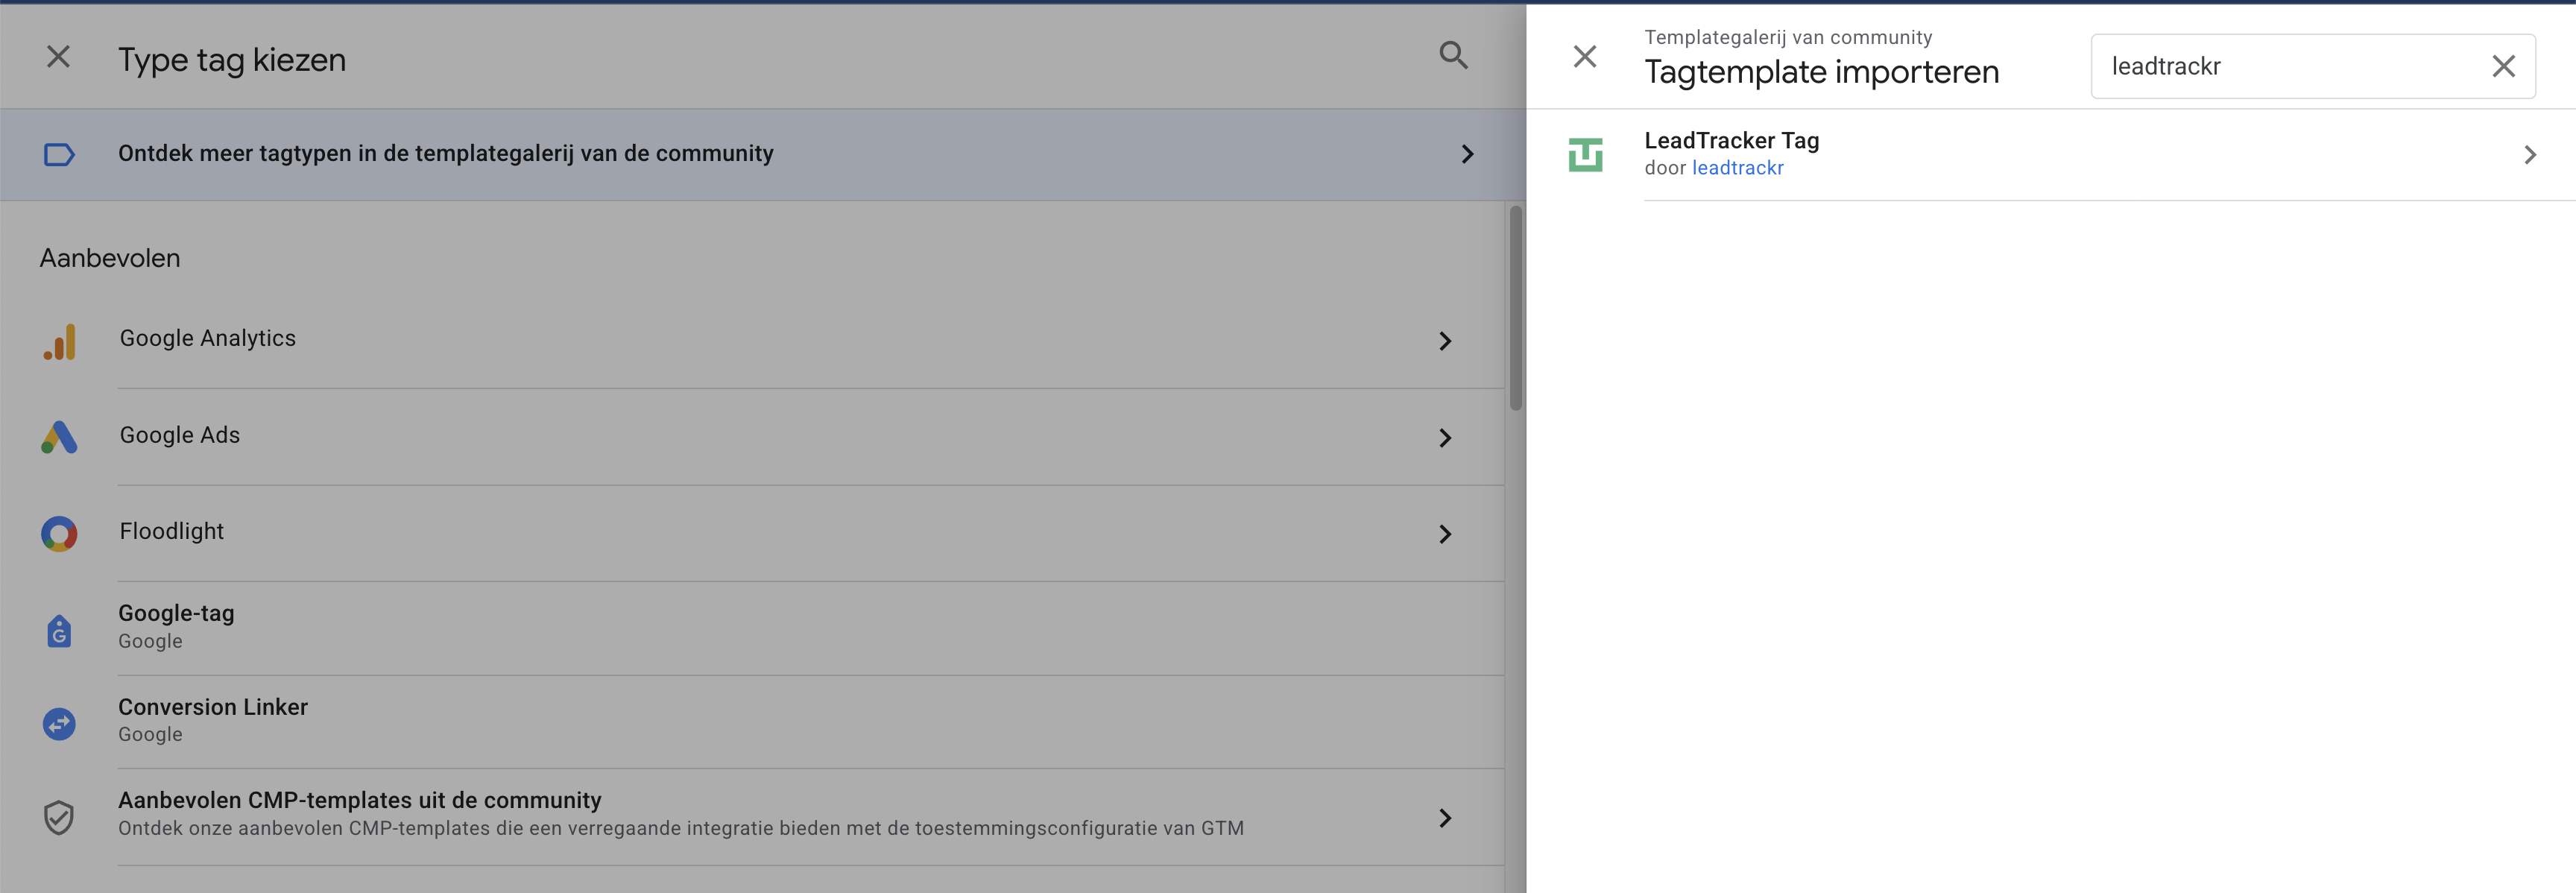
1. Go to your **container** in Tag Manager
2. Click **Templates** → **Search Gallery**
3. Look for **LeadTrackr tag**
4. Click **Add to Workspace**
 ## Step 2: Create a New LeadTrackr Tag
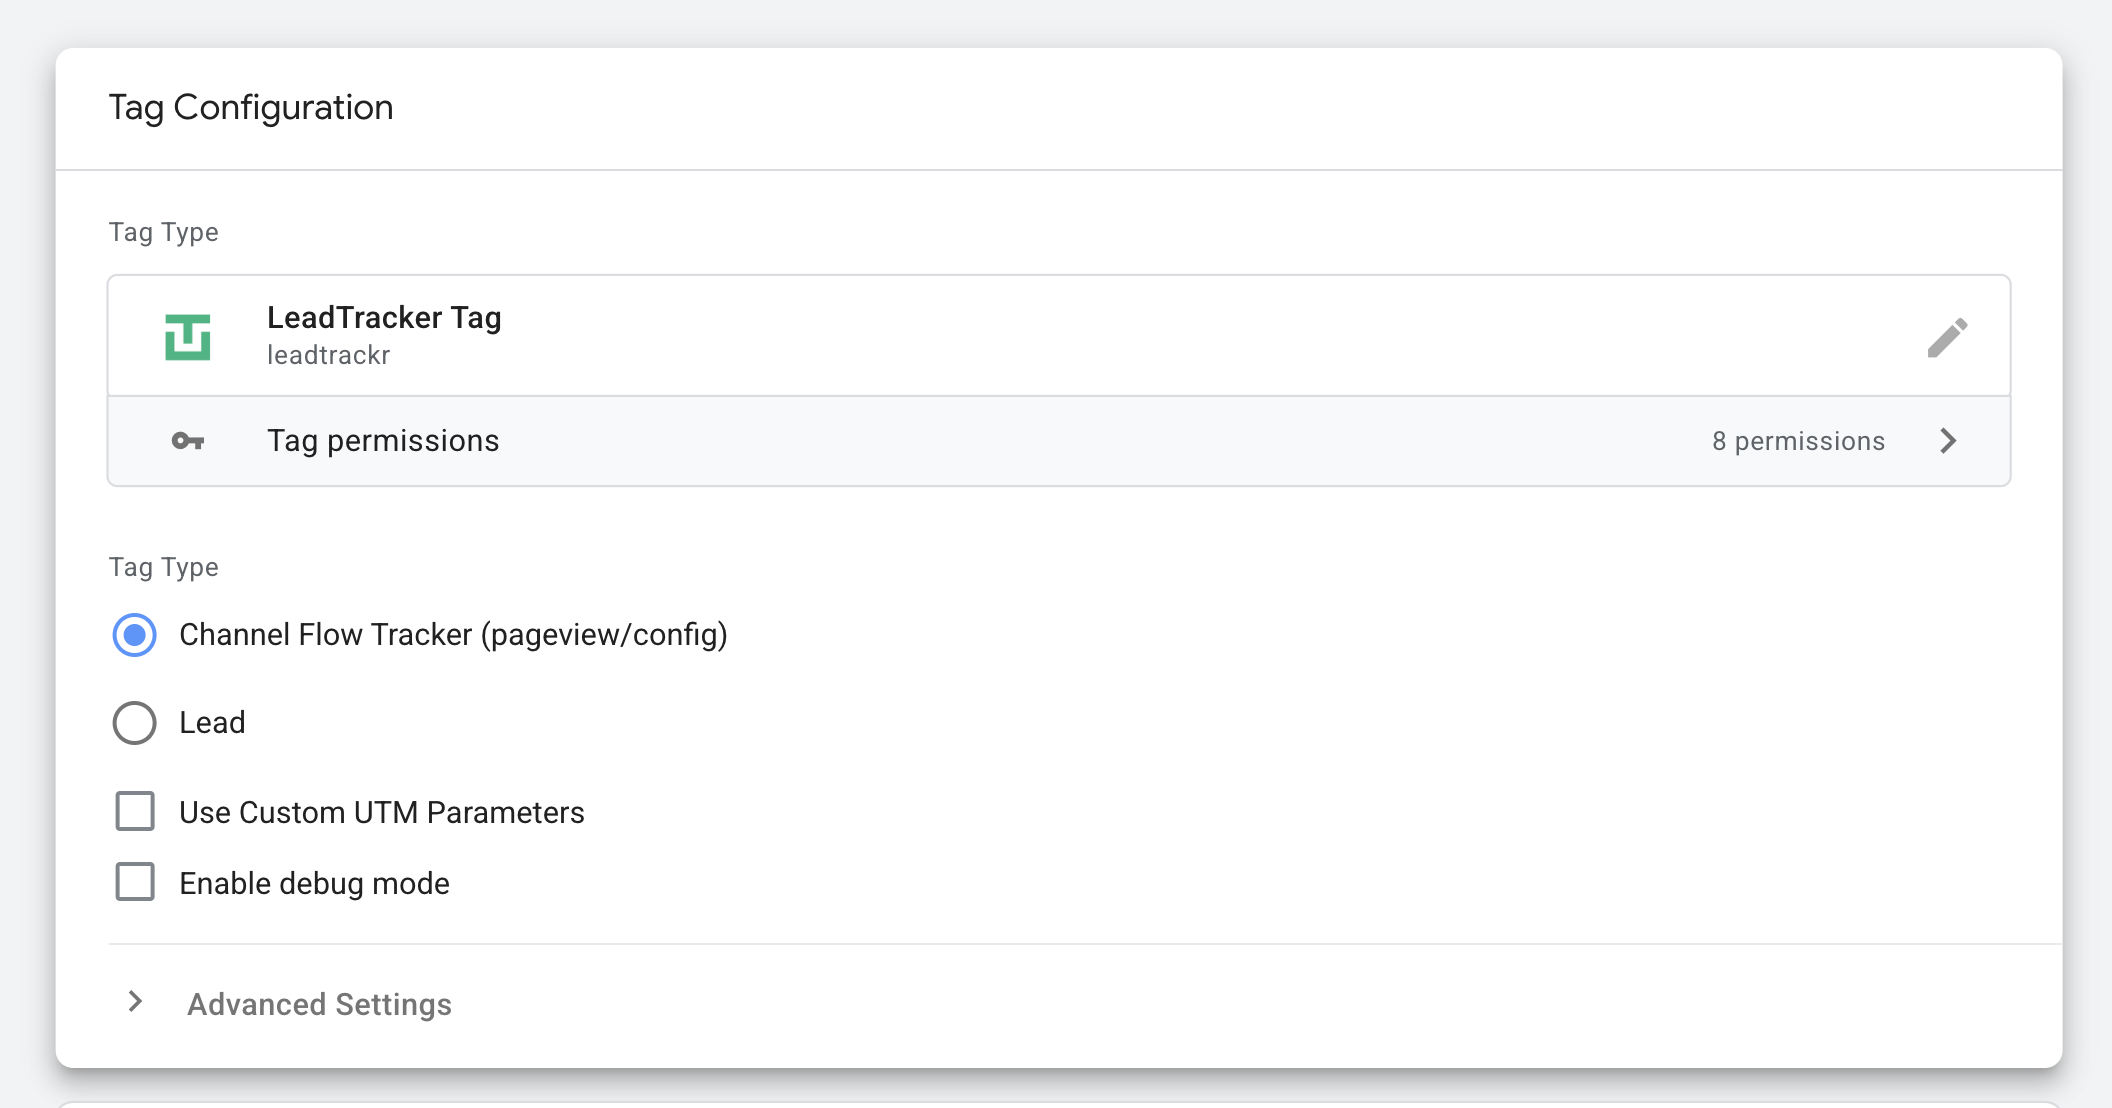
1. Go to **Tags** and click **New**
2. Select **LeadTrackr Tag** as the tag type
3. Choose **Channel Flow Tracker** as the tag type
## Step 2: Create a New LeadTrackr Tag
1. Go to **Tags** and click **New**
2. Select **LeadTrackr Tag** as the tag type
3. Choose **Channel Flow Tracker** as the tag type
 ## Step 3: Add a Trigger
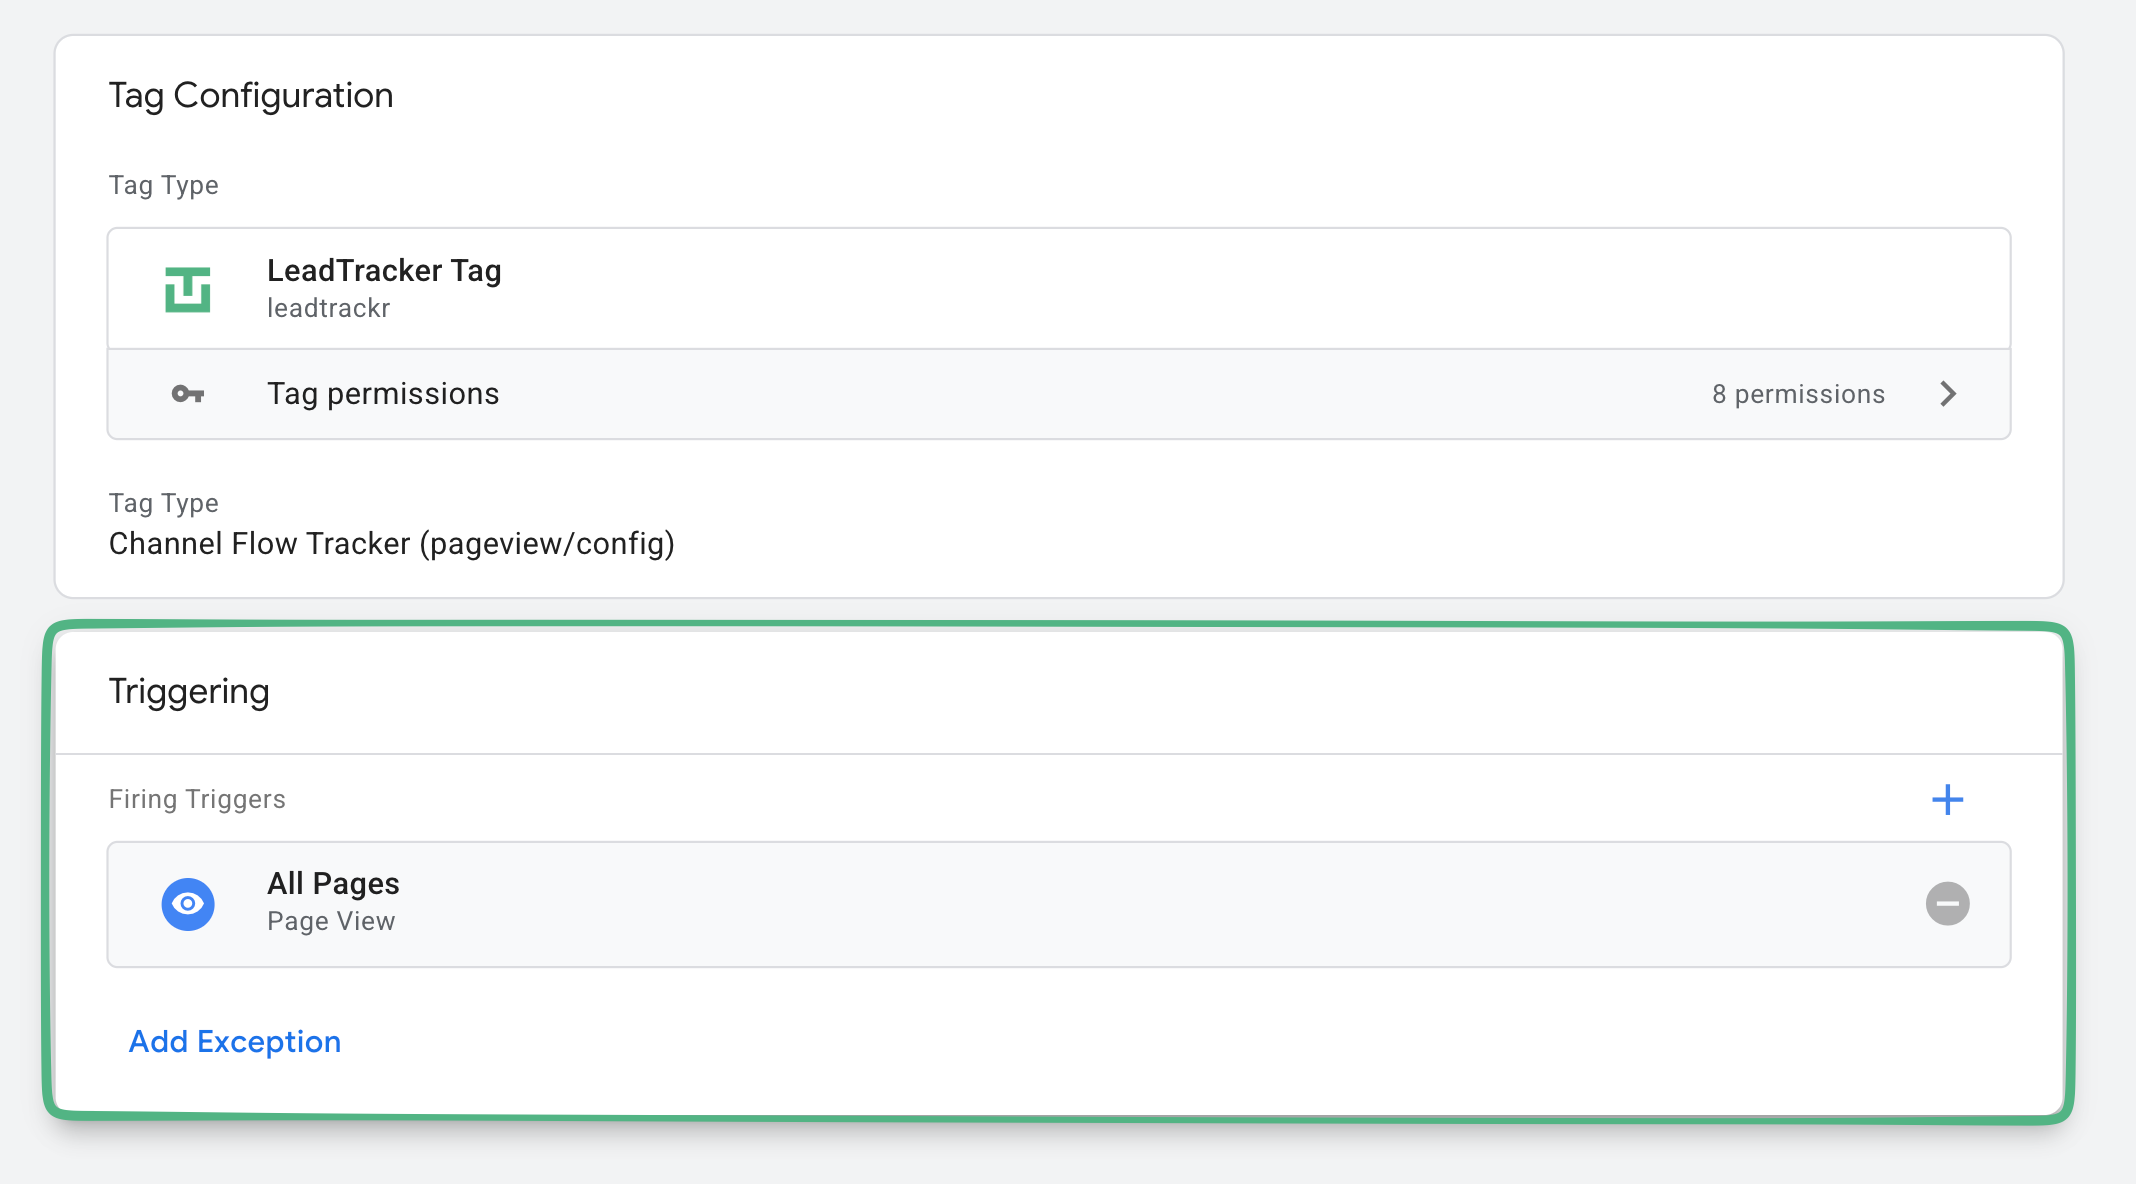
Attach an **All Pages** trigger to the LeadTrackr tag. This ensures the Channel Flow Tracker can capture UTM parameters and build the full user journey before a lead is submitted.
If you're using **Google Consent Mode**, keep the following in mind:
* If your LeadTrackr tag is restricted to fire **only when analytics\_storage is granted**, make sure the tag fires **after consent has been given**
* This allows LeadTrackr to correctly store pageview data and attribution before the lead event occurs
* If the tag fires before consent is granted, the channel flow may be incomplete or missing
## Step 3: Add a Trigger
Attach an **All Pages** trigger to the LeadTrackr tag. This ensures the Channel Flow Tracker can capture UTM parameters and build the full user journey before a lead is submitted.
If you're using **Google Consent Mode**, keep the following in mind:
* If your LeadTrackr tag is restricted to fire **only when analytics\_storage is granted**, make sure the tag fires **after consent has been given**
* This allows LeadTrackr to correctly store pageview data and attribution before the lead event occurs
* If the tag fires before consent is granted, the channel flow may be incomplete or missing
 ## Step 4: Enable UTM Tracking in Your Ad Platforms
To get accurate source/medium/channel data in LeadTrackr, make sure **UTM parameters** are added to your ads.
The tag saves the following parameters:
* `utm_source`
* `utm_medium`
* `utm_campaign`
* `utm_content`
* `utm_term`
## Step 5: Publish Your Container
Once your tag and trigger are configured, **publish your GTM container**.
Your channel flow tracking has now been set up, and will be automatically included in new lead entries.
## What's Next?
Now that your channel flow tracking is active, connect your conversion destinations to start sending qualified leads to your ad platforms.
Send offline conversions to Google Ads
Send offline conversions to Meta (Facebook)
Send offline conversions to Google Analytics 4
Link lead statuses to conversion events
## Step 4: Enable UTM Tracking in Your Ad Platforms
To get accurate source/medium/channel data in LeadTrackr, make sure **UTM parameters** are added to your ads.
The tag saves the following parameters:
* `utm_source`
* `utm_medium`
* `utm_campaign`
* `utm_content`
* `utm_term`
## Step 5: Publish Your Container
Once your tag and trigger are configured, **publish your GTM container**.
Your channel flow tracking has now been set up, and will be automatically included in new lead entries.
## What's Next?
Now that your channel flow tracking is active, connect your conversion destinations to start sending qualified leads to your ad platforms.
Send offline conversions to Google Ads
Send offline conversions to Meta (Facebook)
Send offline conversions to Google Analytics 4
Link lead statuses to conversion events