> ## Documentation Index
> Fetch the complete documentation index at: https://leadtrackr.io/docs/llms.txt
> Use this file to discover all available pages before exploring further.
# Setting Up Google Ads Conversions
> Send offline conversions to Google Ads from LeadTrackr by connecting your account and creating conversion actions.
To send offline conversions to Google Ads from LeadTrackr, you'll need to:
1. Connect your Google account
2. Select your Google Ads account
3. Create one or more **offline conversion actions** in Google Ads
4. Link those conversions to your **conversion labels** in LeadTrackr
## Step 1: Connect Your Google Account
Start by connecting your Google account inside LeadTrackr:
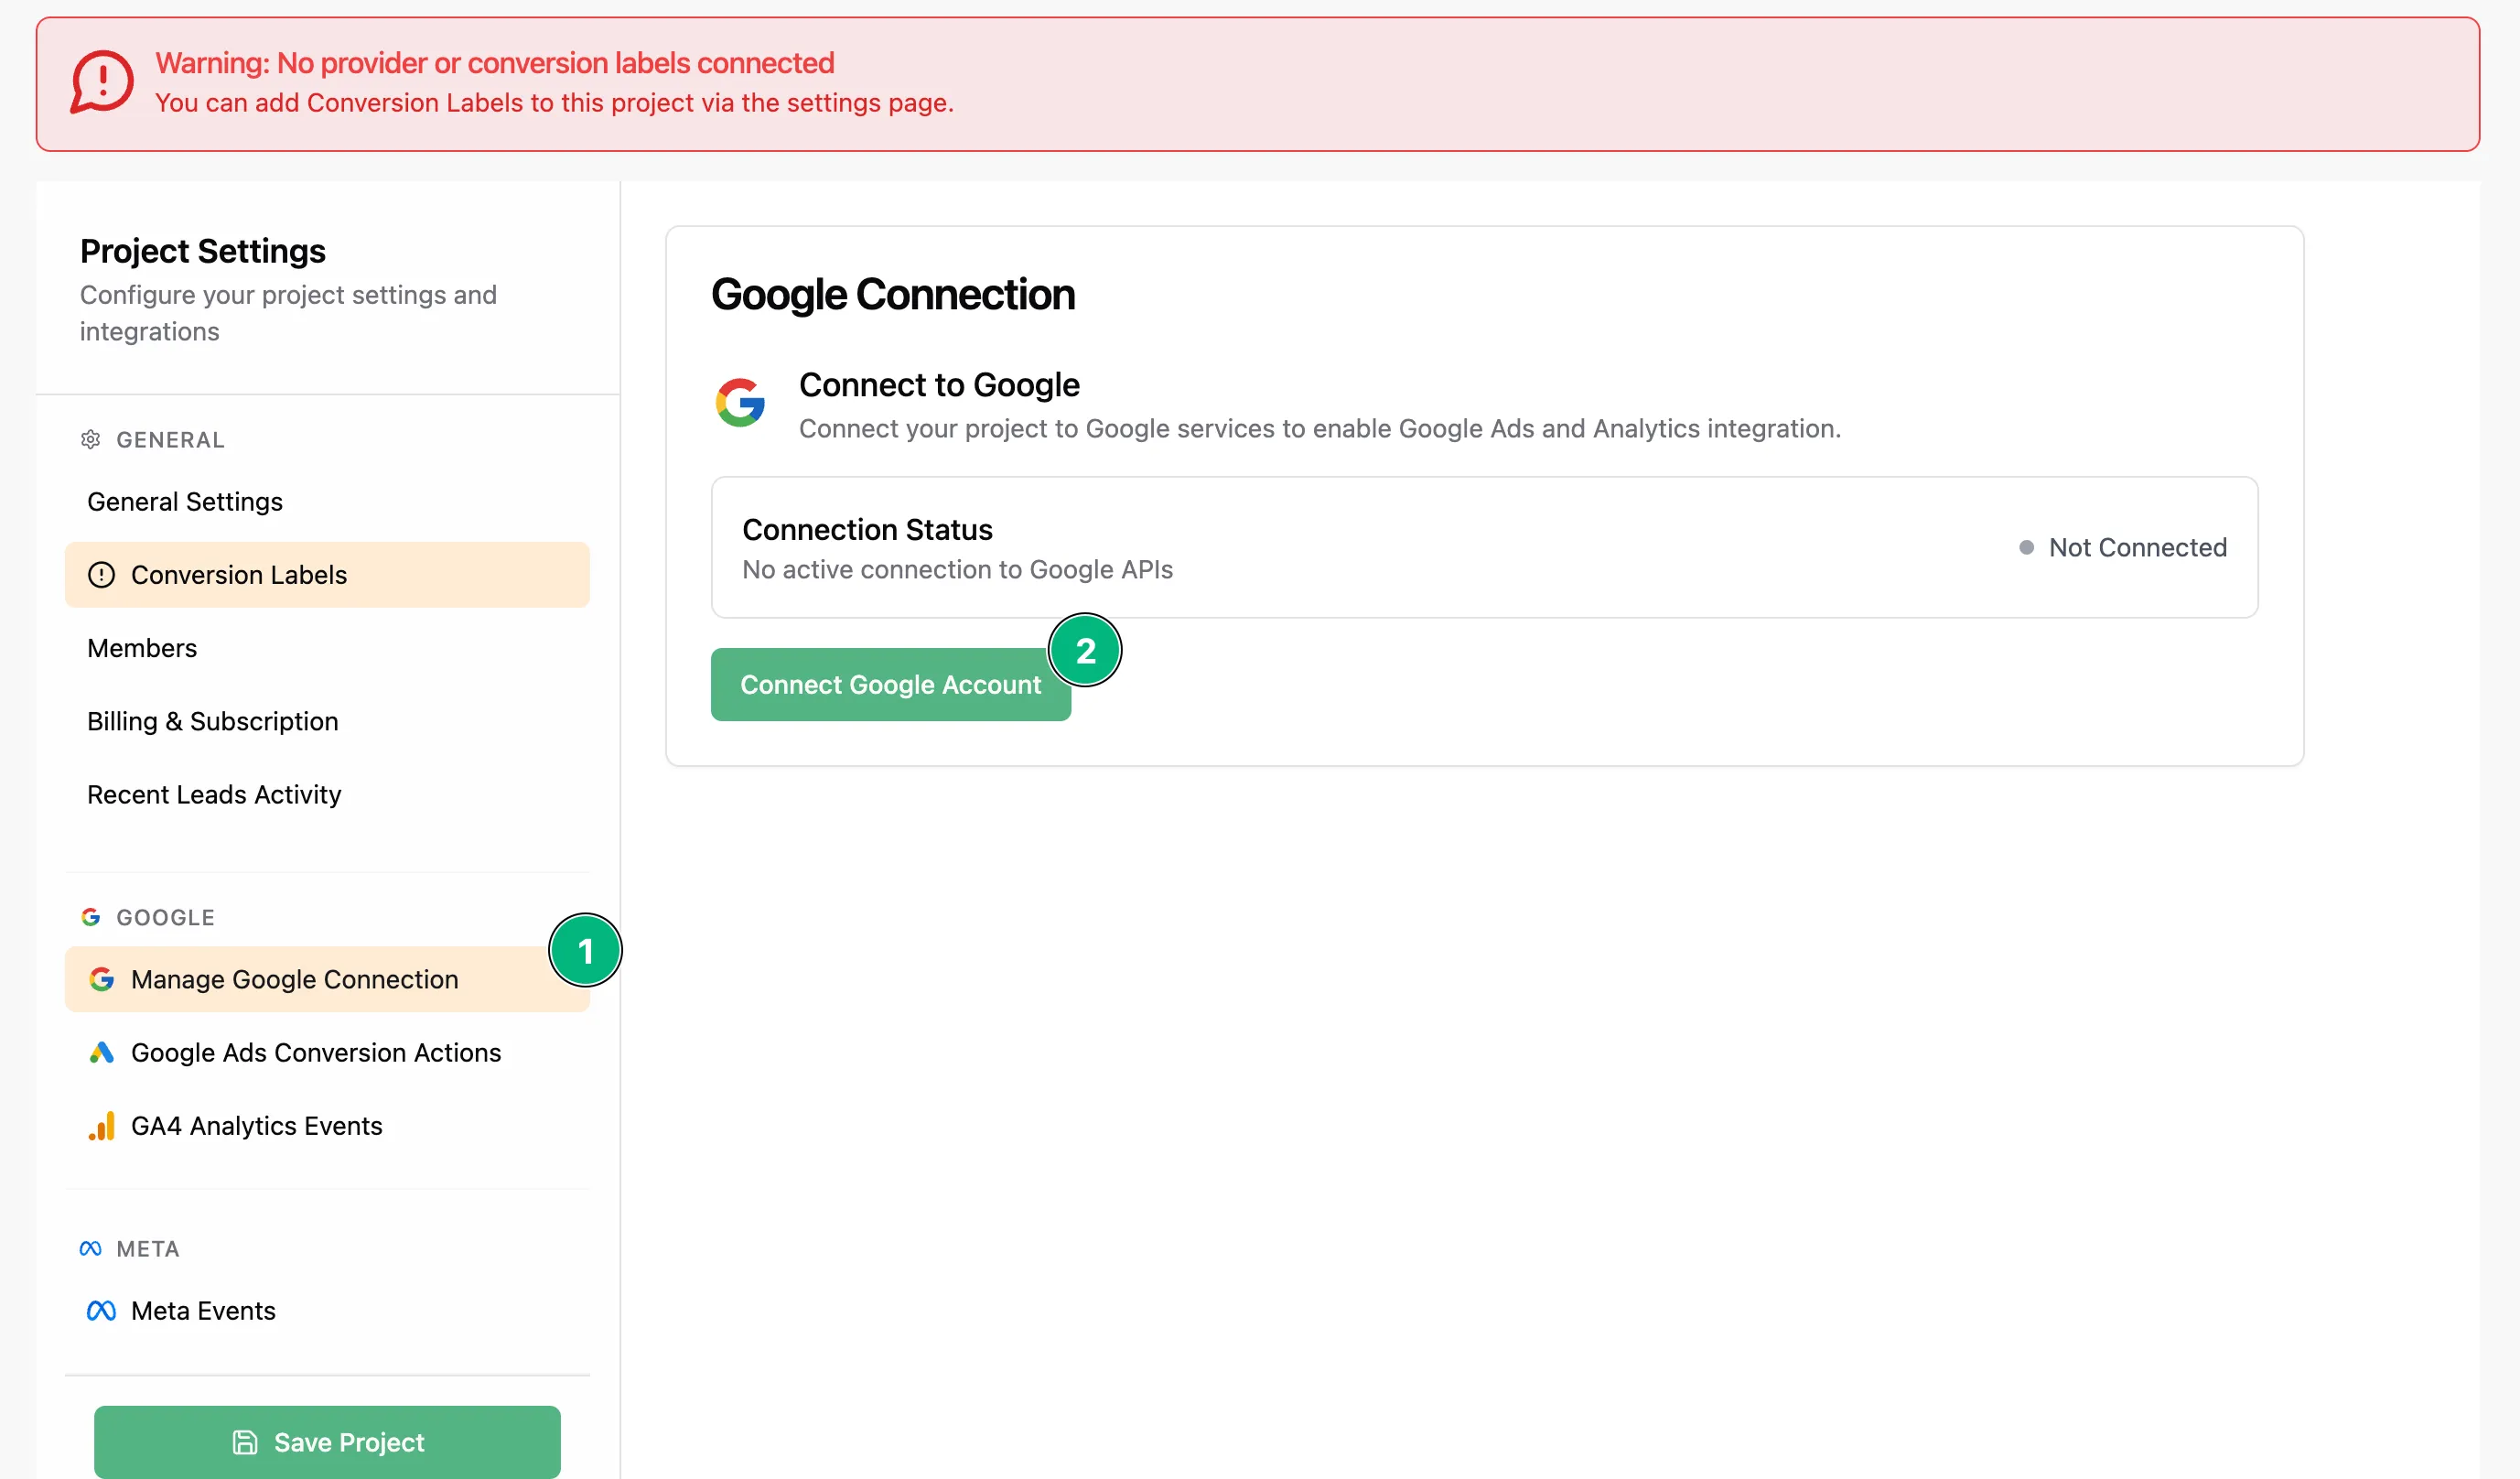
1. Go to your **Project Settings**
2. Click on **Manage Google Connection**
3. Click **Connect Google Account**
4. Follow the prompts to authorize your account
Make sure this Google account has access to your Google Ads account.
 ## Step 2: Select Your Google Ads Account
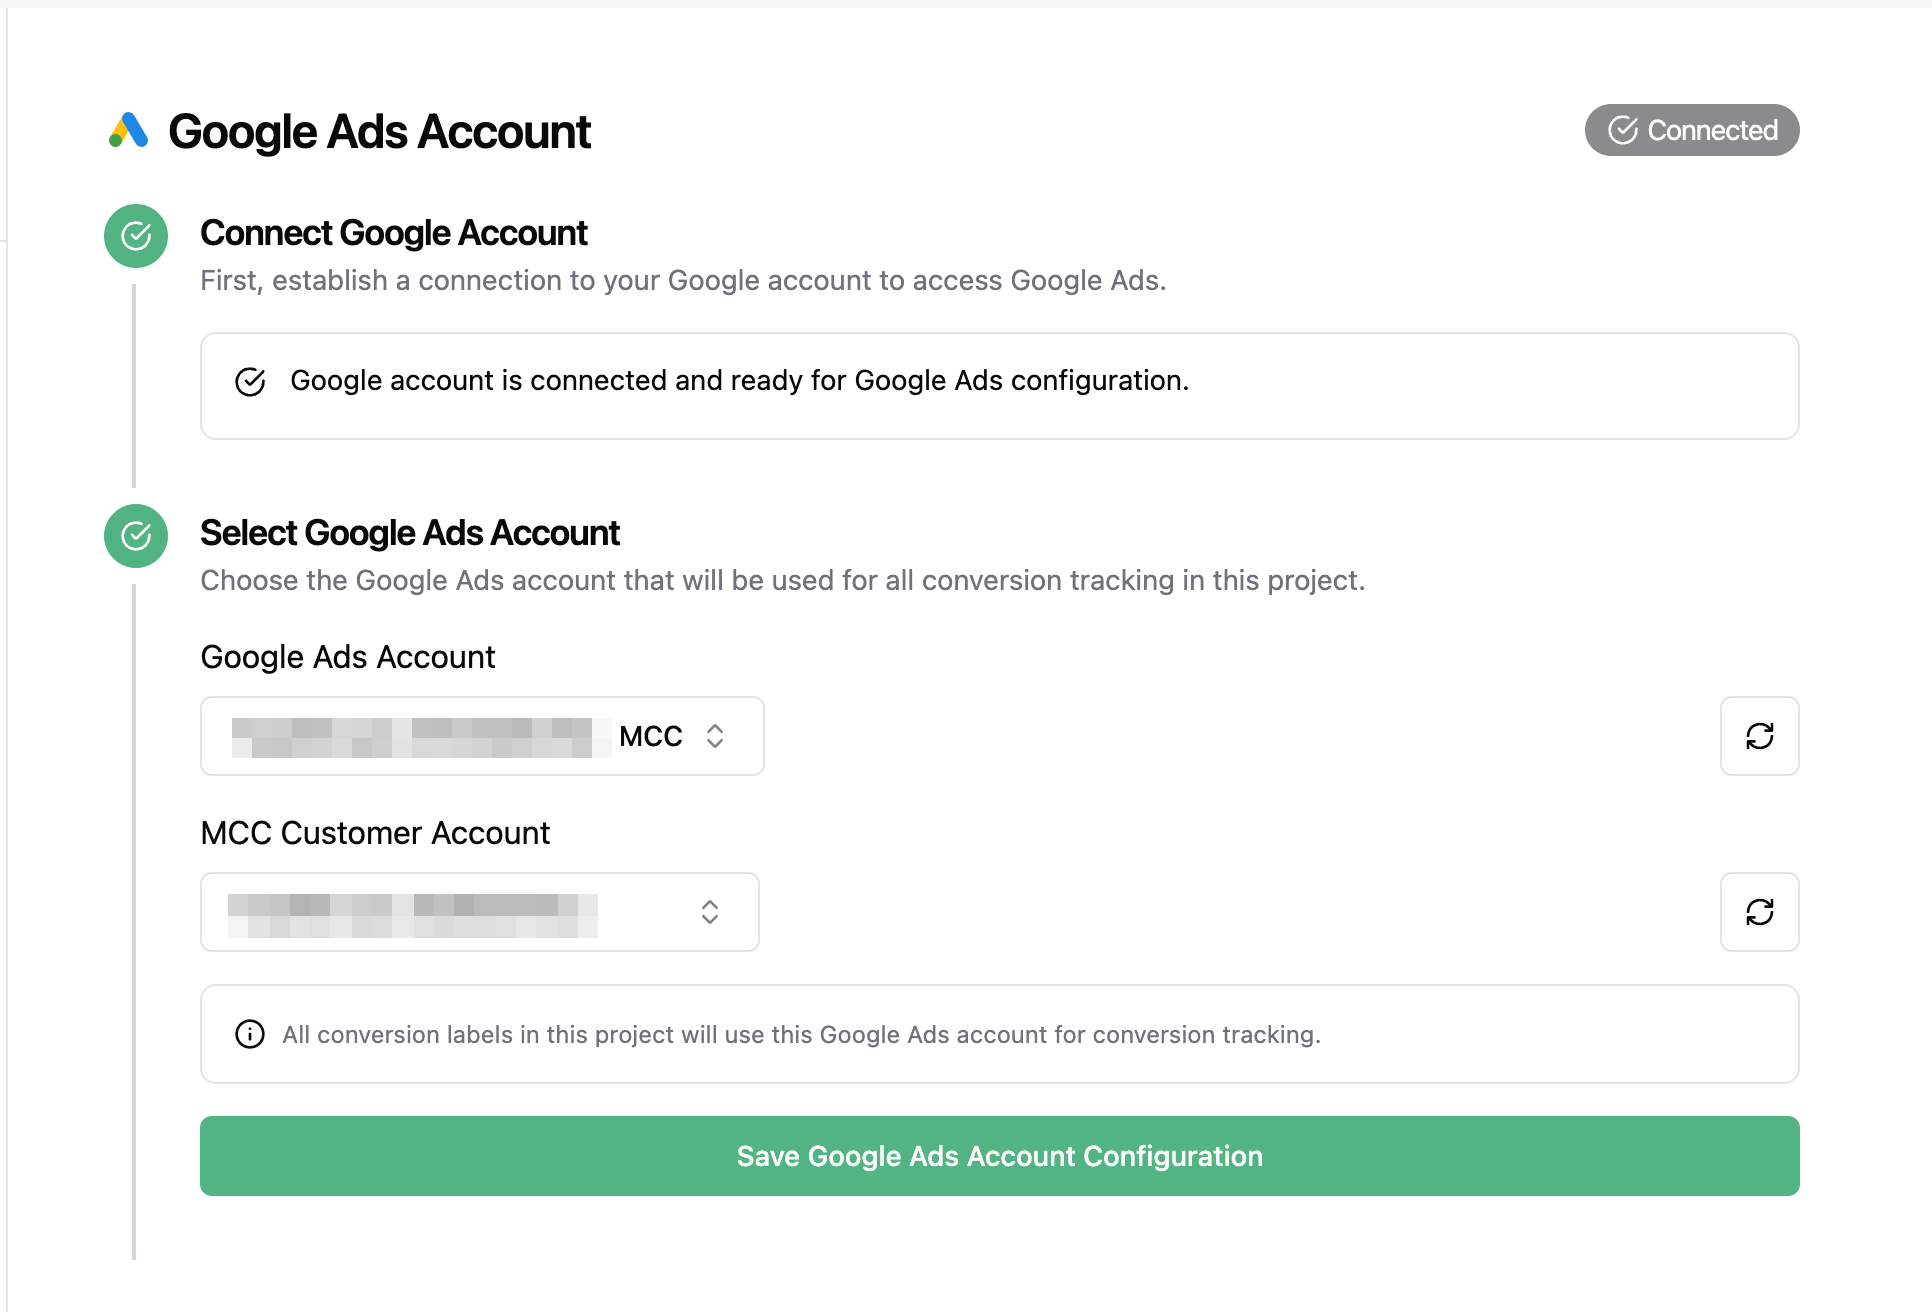
Once connected, go to the **Google Ads Integration** tab.
1. Choose the Google Ads account you want to use
Using a Google MCC (manager) account? First select the MCC, then choose the sub-account you want to use.
## Step 2: Select Your Google Ads Account
Once connected, go to the **Google Ads Integration** tab.
1. Choose the Google Ads account you want to use
Using a Google MCC (manager) account? First select the MCC, then choose the sub-account you want to use.
 ## Step 3: Create an Offline Conversion Action in Google Ads
Next, set up a new conversion action inside your Google Ads account:
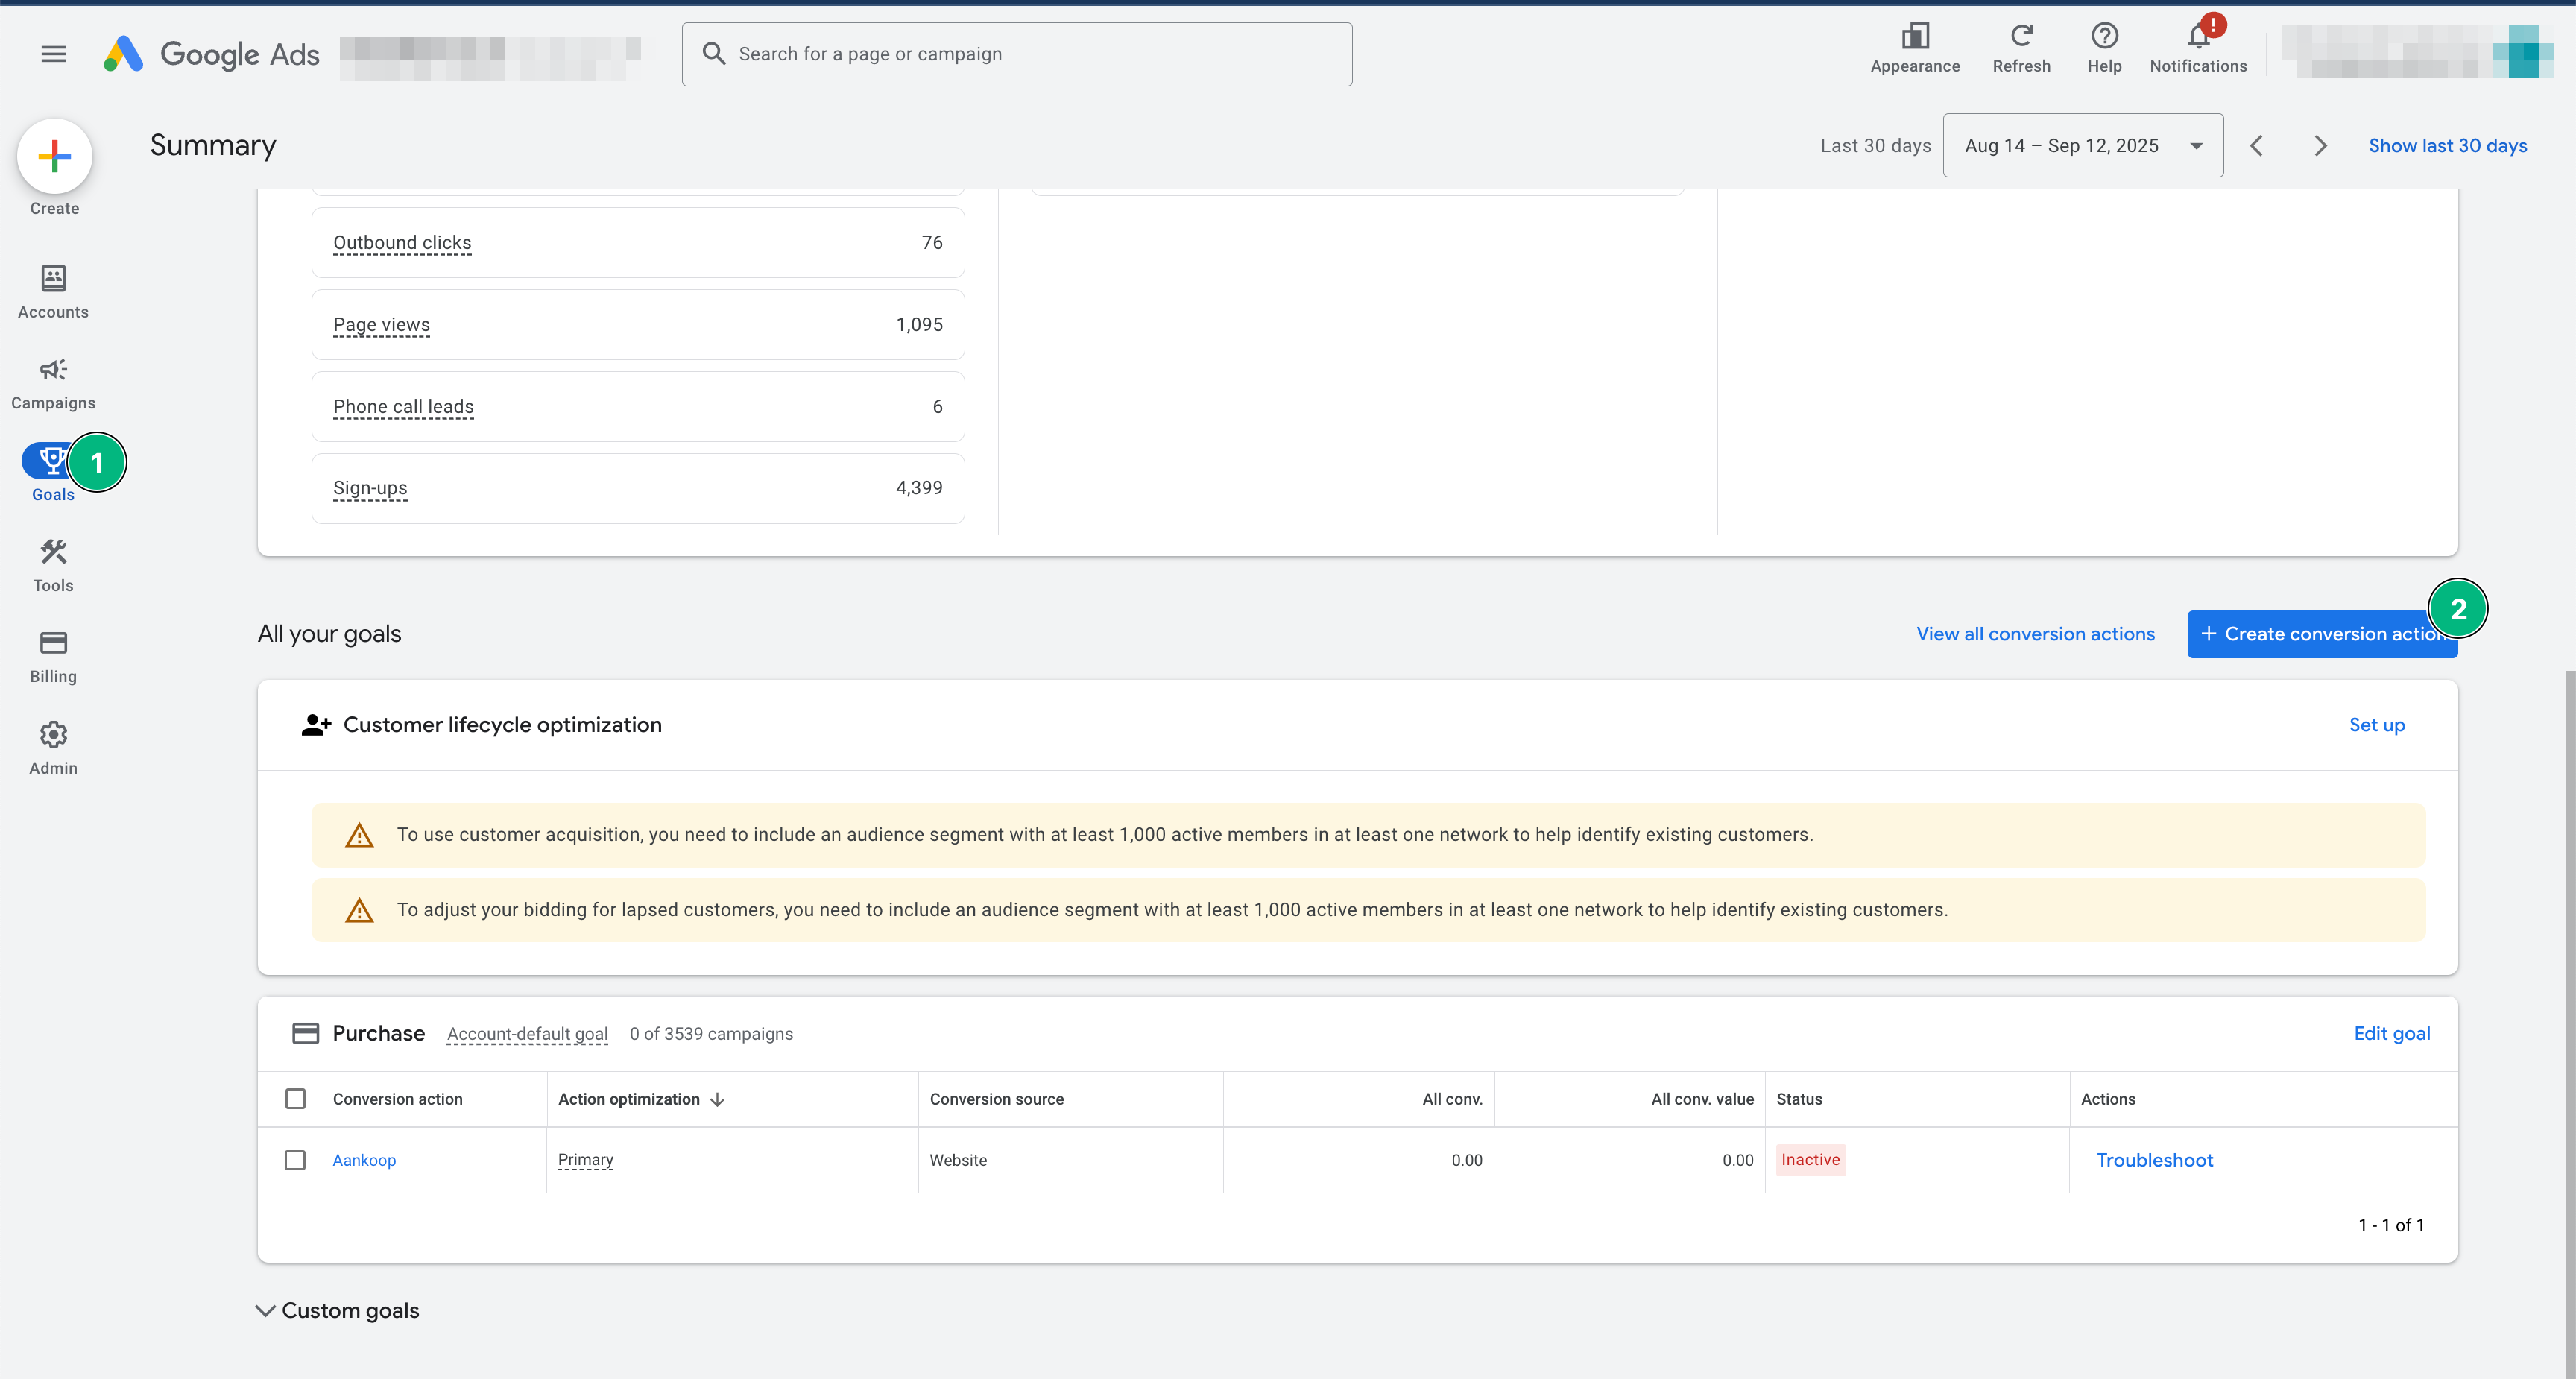
1. Open your **Google Ads account**
2. Navigate to: **Tools & Settings** → **Goals** → **Summary**
3. Click **+ New Conversion Action**
## Step 3: Create an Offline Conversion Action in Google Ads
Next, set up a new conversion action inside your Google Ads account:
1. Open your **Google Ads account**
2. Navigate to: **Tools & Settings** → **Goals** → **Summary**
3. Click **+ New Conversion Action**
 ### Create a New Source
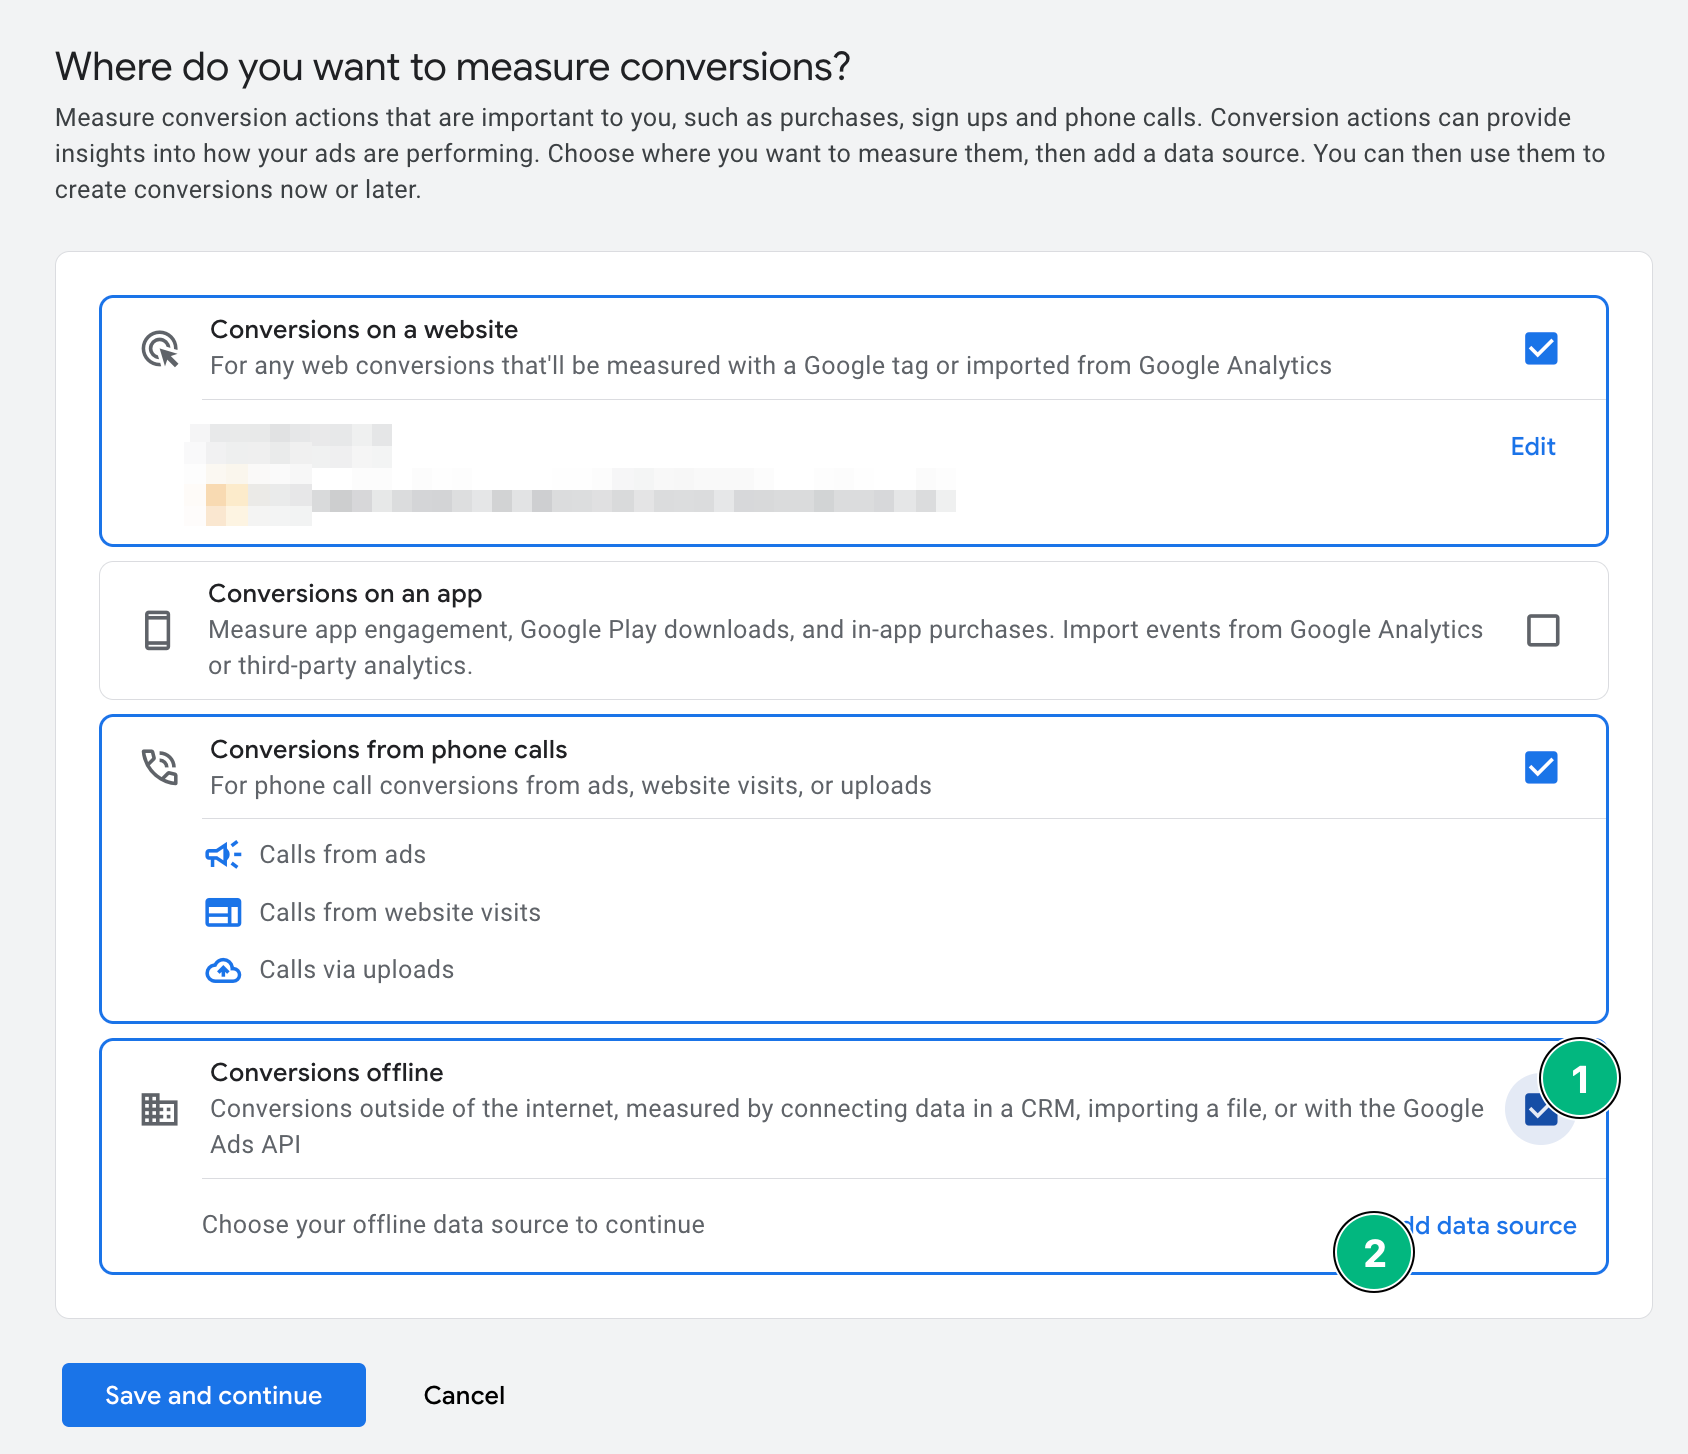
1. Select **Conversions offline**
2. Click **Add data source**
### Create a New Source
1. Select **Conversions offline**
2. Click **Add data source**
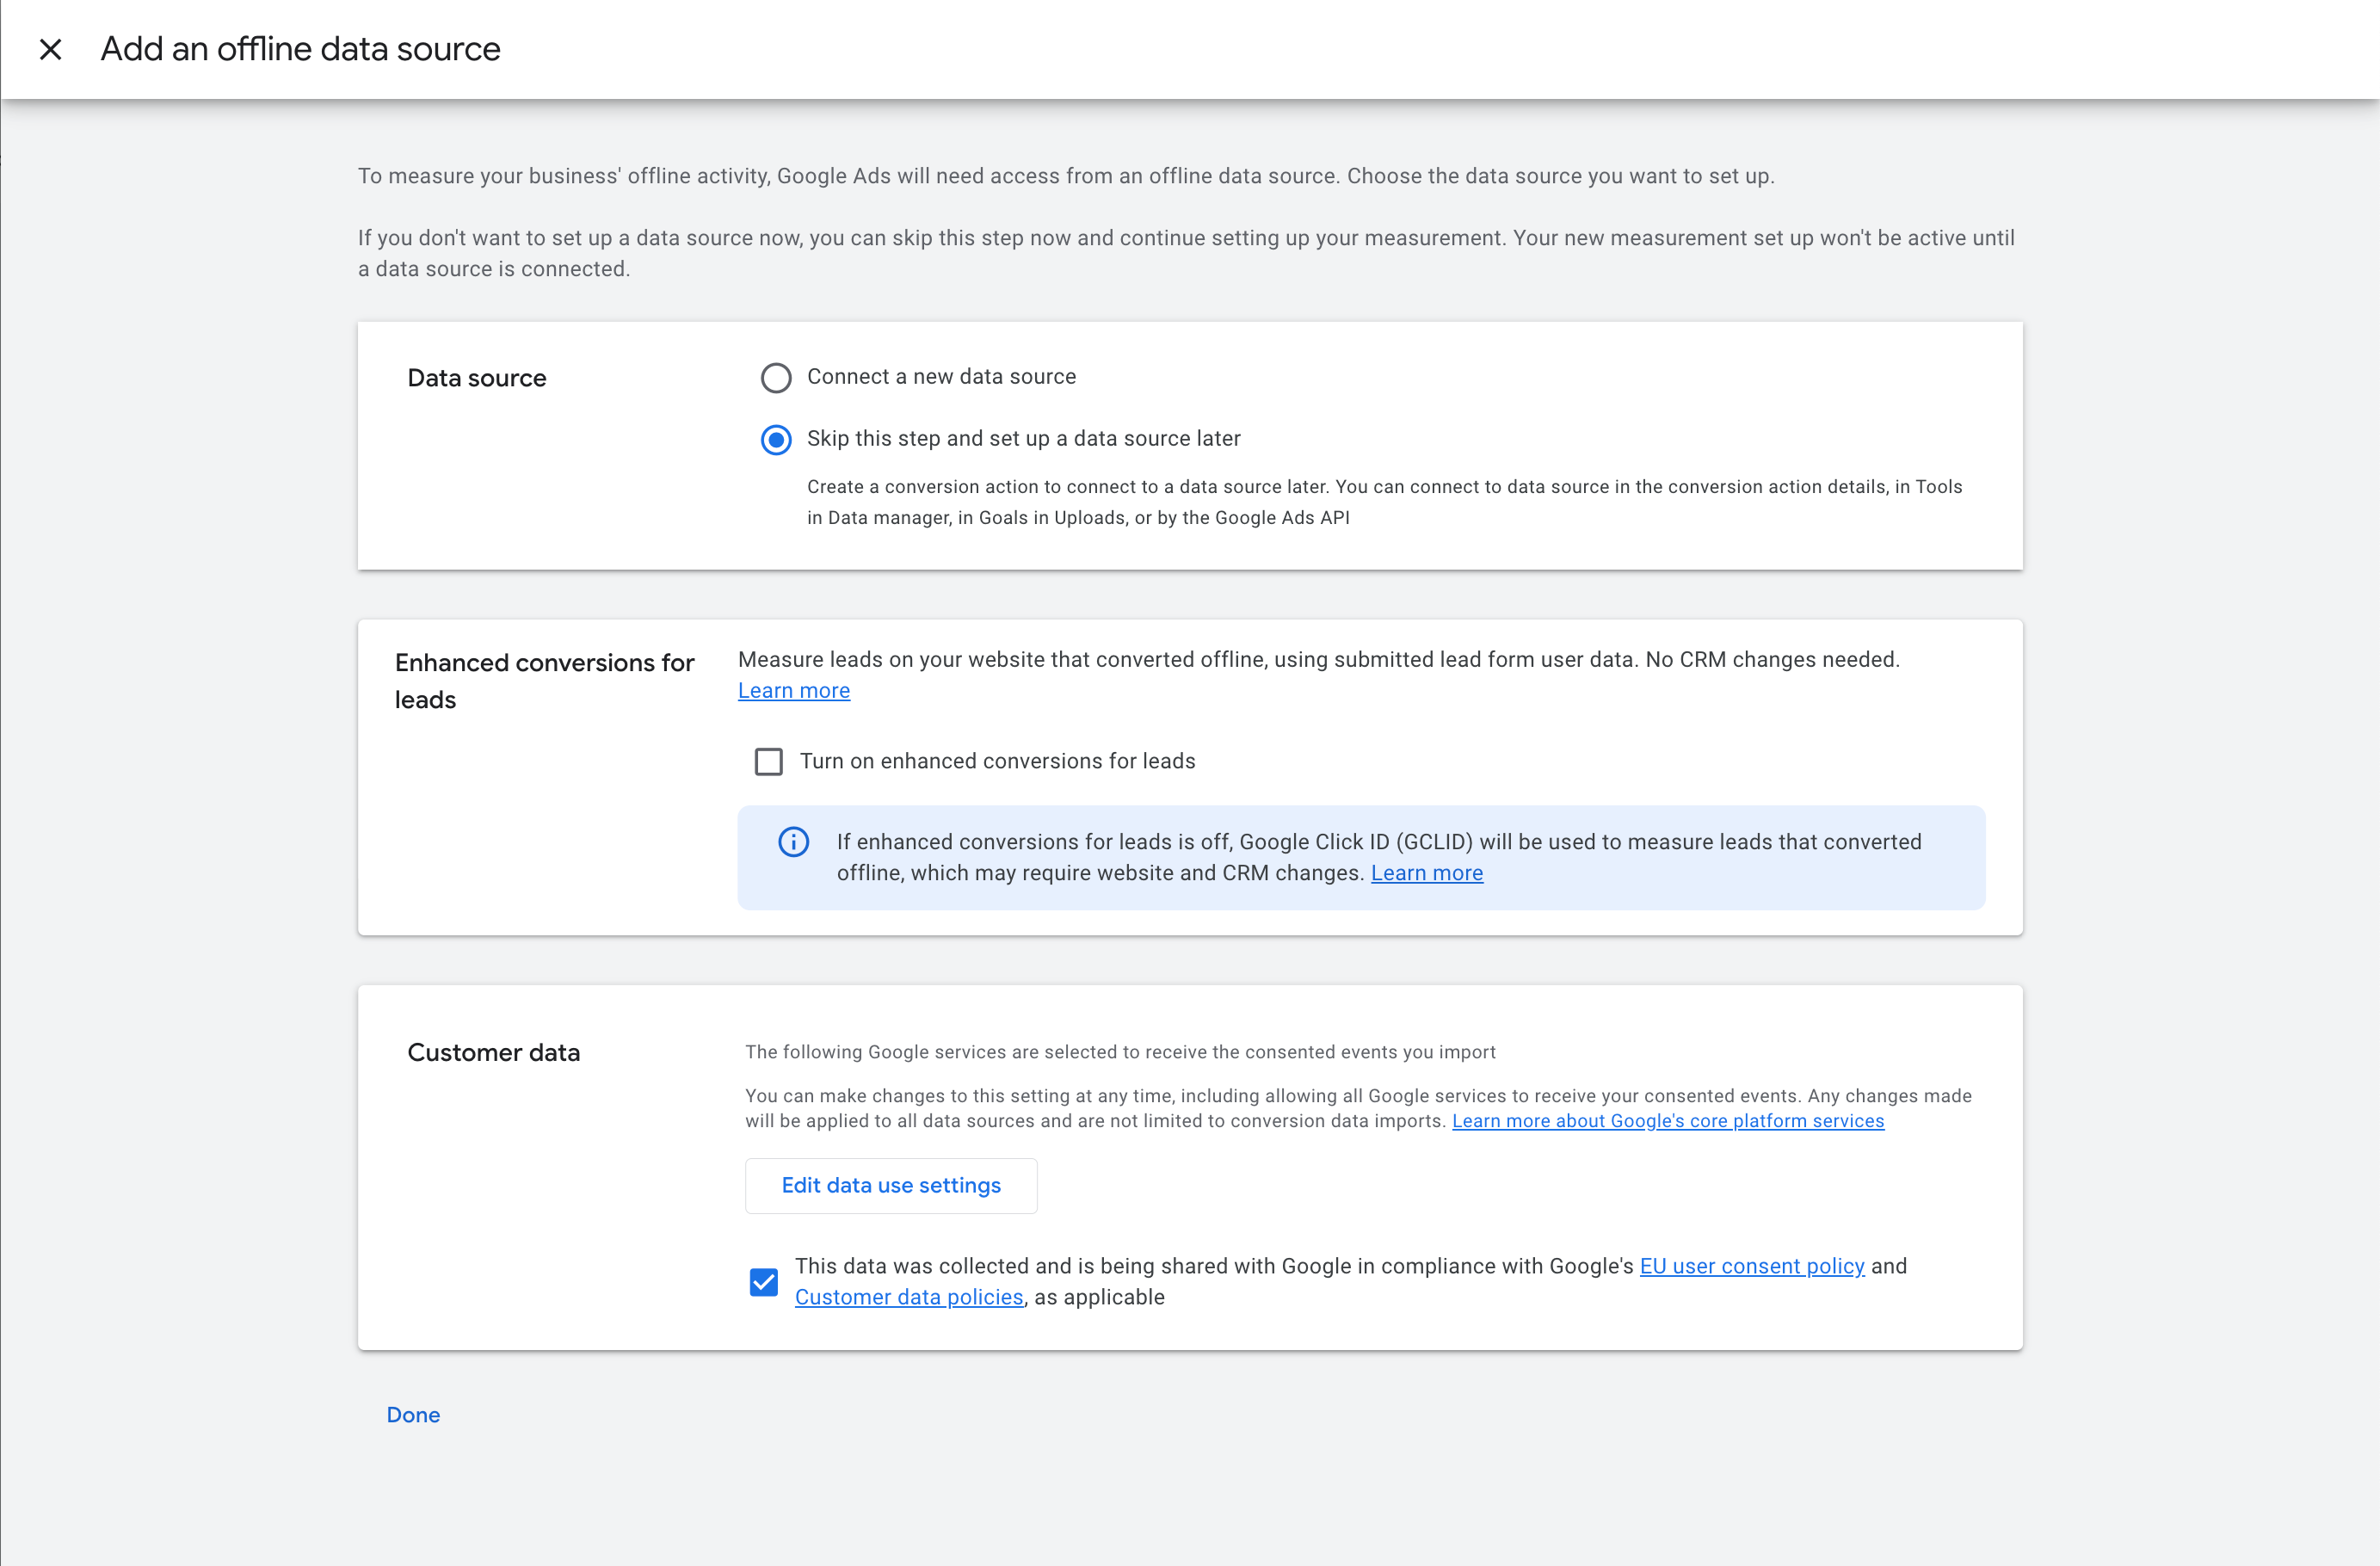
 In the data source settings:
* Select **Skip this step and set up a data source later**
* Tick the checkbox under **Customer Data**
Then click **Save and continue**.
In the data source settings:
* Select **Skip this step and set up a data source later**
* Tick the checkbox under **Customer Data**
Then click **Save and continue**.
 ### Define Your Conversion Name & Category
Now define the **conversion name** that will later be linked to a conversion label in LeadTrackr.
Need help choosing the right names and categories? Read: [Structure Your Conversion Labels for Better Ad Performance](/docs/conversion-labels/structure-conversion-labels)
### Set Conversion Details
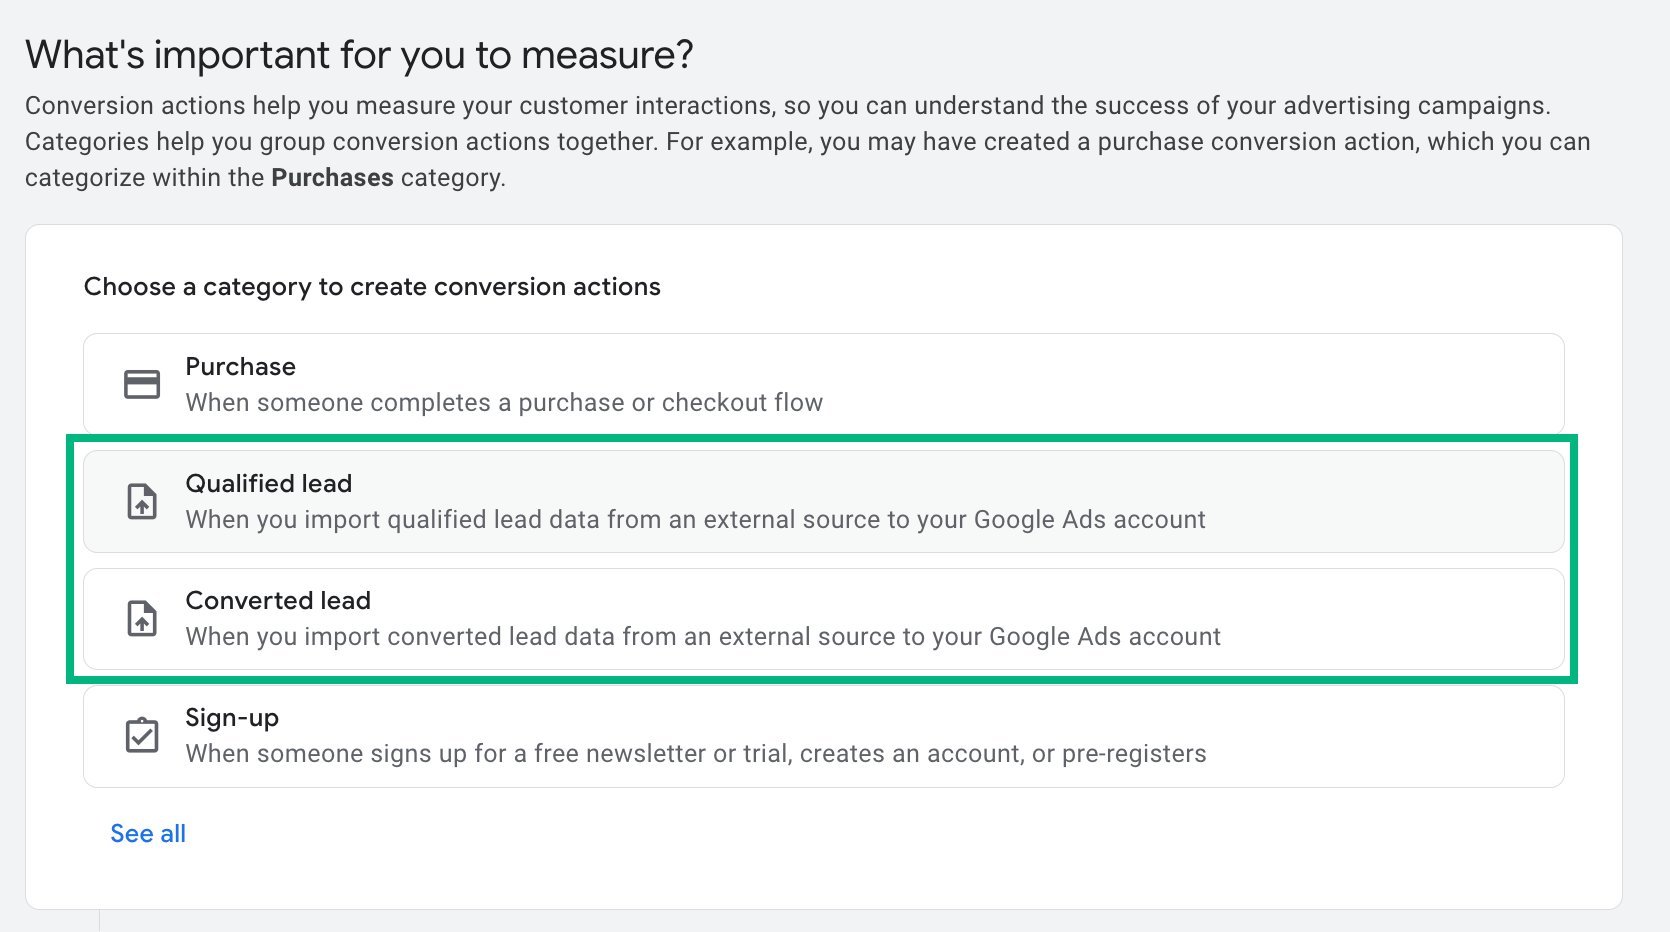
1. Choose a **conversion category** that matches the lead stage:
* **Qualified Lead**
* **Converted Lead**
* Or any other category that fits your funnel
### Define Your Conversion Name & Category
Now define the **conversion name** that will later be linked to a conversion label in LeadTrackr.
Need help choosing the right names and categories? Read: [Structure Your Conversion Labels for Better Ad Performance](/docs/conversion-labels/structure-conversion-labels)
### Set Conversion Details
1. Choose a **conversion category** that matches the lead stage:
* **Qualified Lead**
* **Converted Lead**
* Or any other category that fits your funnel
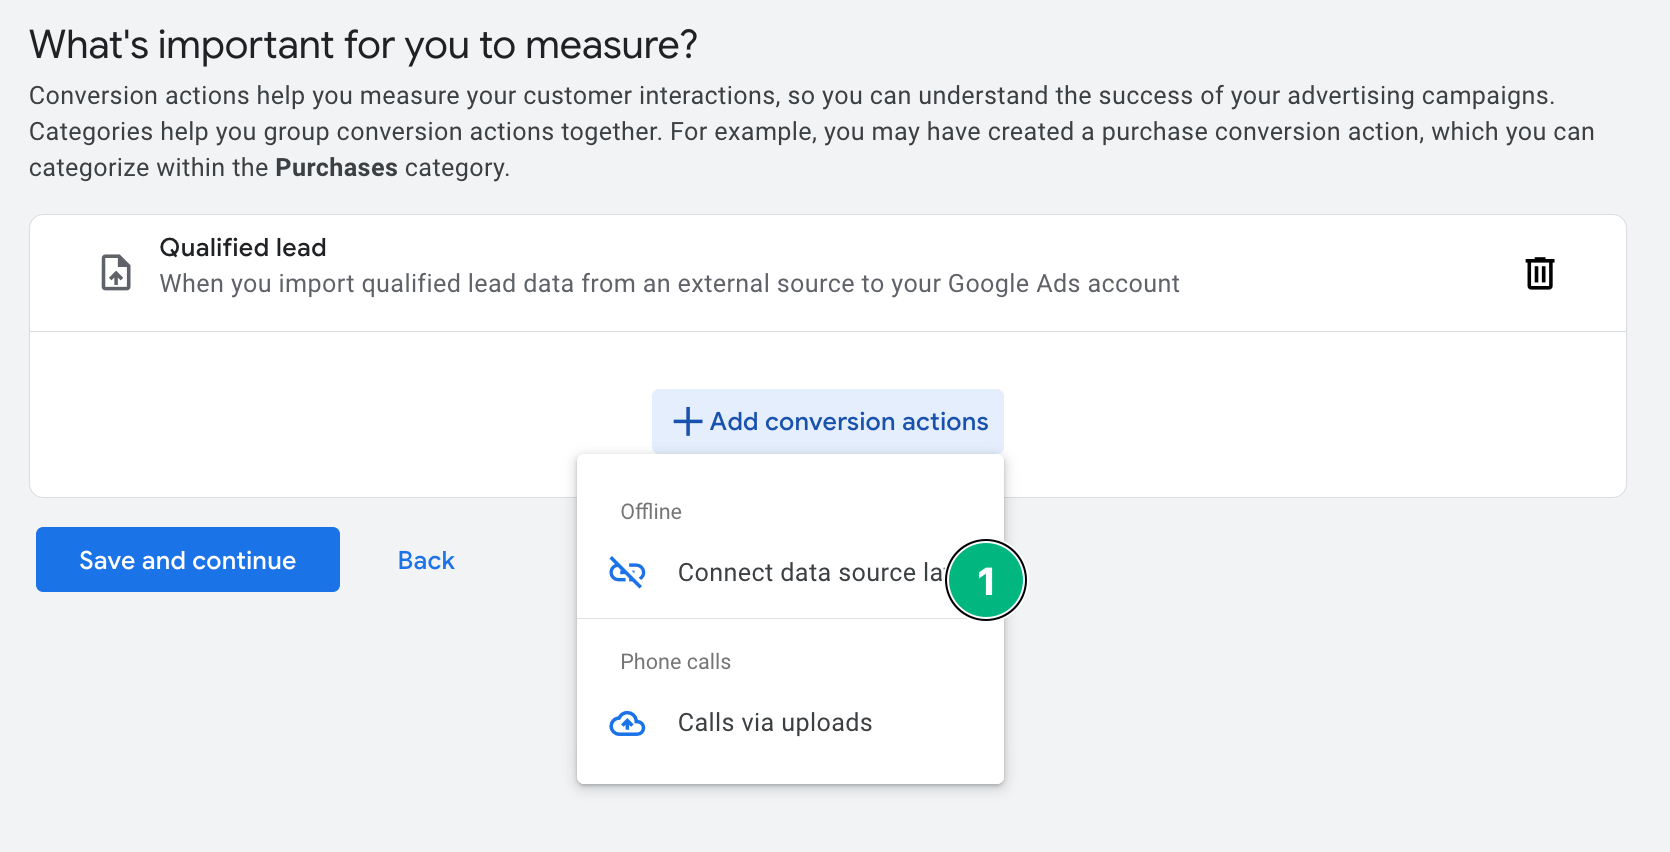
 2. Click **Add conversion actions**
3. Select **Connect data source later**
2. Click **Add conversion actions**
3. Select **Connect data source later**
 ### Recommended Conversion Settings
If you're unsure what to choose, we recommend the following:
| Setting | Recommended value |
| ----------------------------------- | ---------------------------------------- |
| **Value** | Use different values for each conversion |
| **Count** | One |
| **Click-through conversion window** | 90 days |
| **Engaged-view conversion window** | 3 days |
| **Attribution model** | Data-driven |
## What's Next?
Now that your offline conversions are set up in Google Ads, go back to LeadTrackr and set up your **conversion labels** to link your internal lead statuses to Google Ads conversion events.
Link lead statuses like "Quote Sent" or "Customer Signed" to Google Ads conversions
## Further Reading
* [About offline conversion imports — Google Ads Help](https://support.google.com/google-ads/answer/2998031)
* [Enhanced conversions for leads — Google Ads Help](https://support.google.com/google-ads/answer/11347292)
### Recommended Conversion Settings
If you're unsure what to choose, we recommend the following:
| Setting | Recommended value |
| ----------------------------------- | ---------------------------------------- |
| **Value** | Use different values for each conversion |
| **Count** | One |
| **Click-through conversion window** | 90 days |
| **Engaged-view conversion window** | 3 days |
| **Attribution model** | Data-driven |
## What's Next?
Now that your offline conversions are set up in Google Ads, go back to LeadTrackr and set up your **conversion labels** to link your internal lead statuses to Google Ads conversion events.
Link lead statuses like "Quote Sent" or "Customer Signed" to Google Ads conversions
## Further Reading
* [About offline conversion imports — Google Ads Help](https://support.google.com/google-ads/answer/2998031)
* [Enhanced conversions for leads — Google Ads Help](https://support.google.com/google-ads/answer/11347292)